
5 Steps to Treat Dry Rot in Wood
Fix dry rot permanently with this proven five-step method: stop moisture, remove rotted wood, apply fungicide, harden with epoxy, then finish.
By Seattle Trim Repair · Published · Updated
Dry rot is serious fungal decay that can compromise your home’s structural integrity if left unchecked. The fungus Serpula lacrymans thrives when wood moisture levels exceed 20 percent, breaking down cellulose and lignin to leave wood soft, crumbly, and weak. Unlike wet rot, which stays confined to the damp area, dry rot spreads aggressively through walls, floors, and even masonry to colonize new timber. In Seattle’s wet climate, dry rot is a persistent threat that demands prompt, thorough treatment. This five-step process eliminates existing rot and prevents recurrence when followed correctly.
The key to successful dry rot treatment is addressing both the visible damage and the underlying cause. Patching surface rot without fixing the moisture source guarantees the fungus will return, often more extensively than before. Each step in this process serves a specific purpose: eliminating the moisture that feeds the fungus, removing all infected material, killing remaining spores, reinforcing weakened wood, and sealing the repair against future moisture intrusion.
Tools and Materials You Need
Before starting, gather the right equipment. You will need a moisture meter (pin or pinless type) to identify areas with excessive moisture, a sharp awl or screwdriver for testing wood integrity, wood chisels and wire brushes for removing damaged material, saws for cutting out rotted sections, foam or chip brushes for applying treatments, putty knives for shaping fillers, sanding blocks and sandpaper for finishing, and paint scrapers for surface preparation.
For materials, stock borate-based fungicide or EPA-approved biocide to sterilize wood, epoxy wood hardener to reinforce weakened fibers, two-part epoxy filler for rebuilding cavities, high-quality exterior primer to seal the surface, and 100 percent acrylic exterior paint for weather protection. A basic DIY repair kit costs approximately $30 to $50 for supplies.
Safety equipment is non-negotiable. Wood hardeners contain high levels of volatile organic compounds that are dangerous to inhale and should never contact skin or eyes. Wear safety goggles, an N95 mask or respirator rated for organic vapors, rubber gloves, and long sleeves throughout the process. Work in a well-ventilated area, especially when applying chemical treatments.
Step 1: Find and Fix the Moisture Source
Before touching the damaged wood, identify and eliminate the moisture problem feeding the rot. Dry rot is a symptom of a bigger issue—persistent moisture that allows fungal growth. Without fixing the underlying leak or drainage problem, any repair you make will be temporary.
Start with a moisture meter to check suspect areas. The meter detects where excess moisture originates, not just where visible damage appears. In Seattle homes, common moisture sources include clogged gutters that overflow onto fascia and siding, missing or damaged flashing around windows, doors, and roof-wall intersections, deteriorated caulking that allows water penetration, poor drainage near deck posts and door thresholds, and inadequate ventilation in crawl spaces or attics. With 155 wet days annually in Seattle and average rainfall of 37 inches, even small drainage problems quickly saturate wood beyond the 20 percent threshold where fungus thrives.
Inspect your home’s interior as well. Look for leaking pipes, malfunctioning bathroom exhaust fans that allow humidity to accumulate, and inadequate attic ventilation that traps moisture. Pay special attention to areas where wood contacts soil or concrete—deck posts, lower siding courses, door thresholds—as moisture wicks upward from the ground into porous materials.
Once identified, fix the problem immediately. Repair or replace damaged flashing, clean and repair gutters and downspouts so they drain properly, seal plumbing leaks, improve ventilation in enclosed spaces, and regrade soil away from the foundation if necessary. Take photos of problem areas after heavy rain to confirm your fixes work. After addressing the moisture source and verifying the wood’s moisture content drops below 20 percent, you are ready to remove damaged material.
Step 2: Remove All Rotted Wood
Complete removal of infected wood is critical. Even small remnants of rotted material can reinfect the entire area. The fungus spreads through microscopic threads that extend well beyond the soft, visible damage.
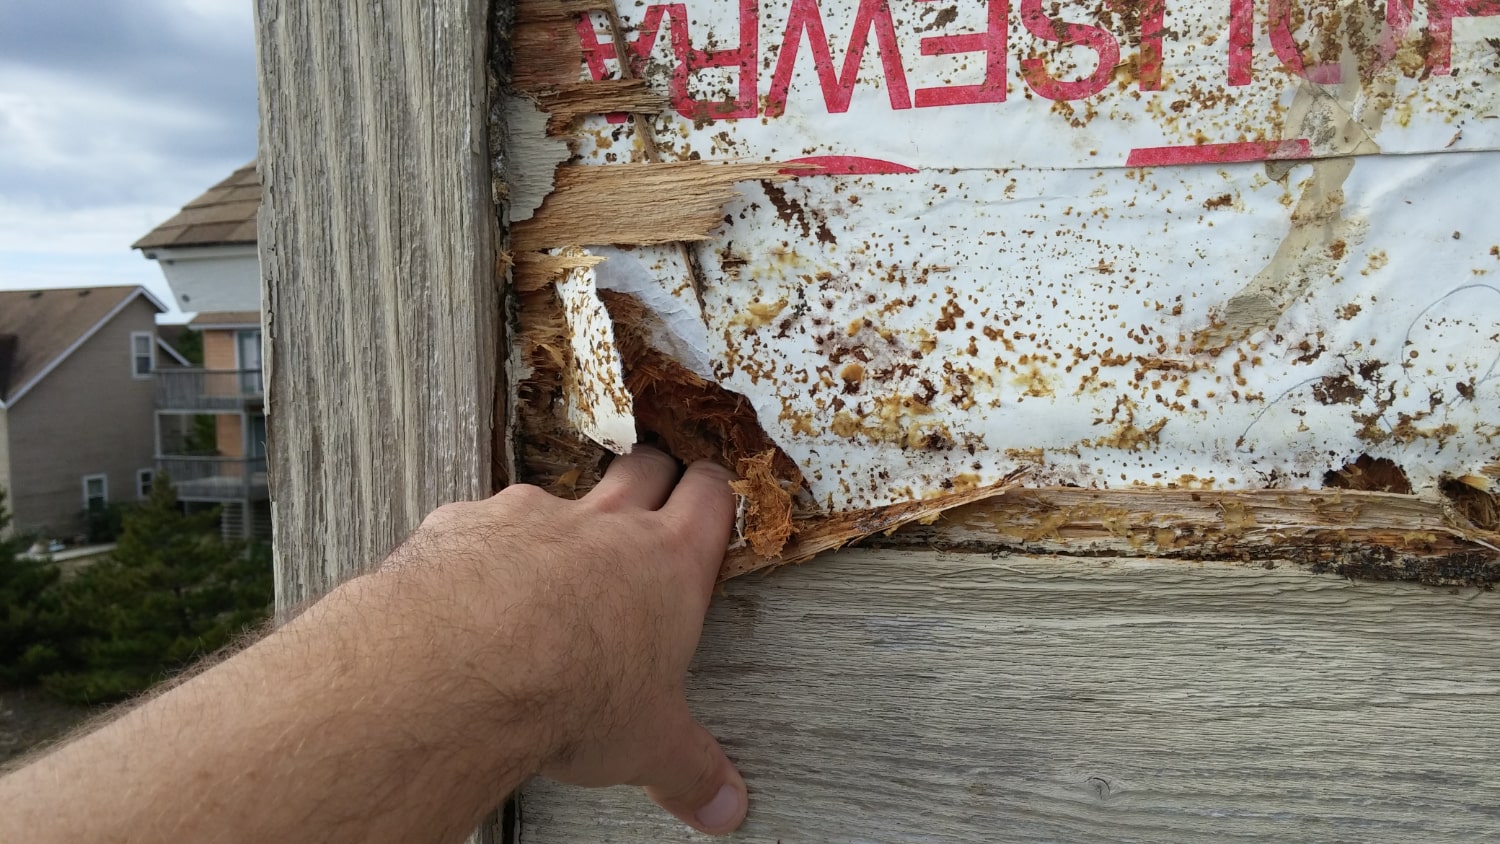
Test wood with a screwdriver or sharp awl. Press gently into suspect areas—healthy wood resists penetration, while rotted wood crumbles or gives way easily. Look for cubical cracking, which appears as deep, square-like cracks on the surface, and visible fungal growth such as white cottony patches or gray web-like masses.
Use a wood chisel to remove large sections of decayed material. Follow with a wire brush to scrub away smaller debris and loose fungal residue. A paint scraper helps clear off surface contamination. Continue until you expose solid, healthy wood that resists probing. The transition from rotted to sound wood is usually distinct—stop when you reach firm material that no longer yields to pressure.
Here is the critical part: cut a buffer zone beyond the visible damage. Remove apparently sound wood extending at least three feet in all directions from the affected area to eliminate every trace of fungal threads. For smaller repairs, trim at least one extra inch along all edges. This buffer zone removal ensures complete eradication. The fungus spreads beyond what you can see or feel, and leaving any infected material guarantees recurrence.
Check behind nearby surfaces as well. Dry rot often spreads through wall cavities, behind drywall, and into adjacent framing members. If rot affects siding, inspect the sheathing beneath. If window trim shows decay, check the rough framing around the opening. The full extent of damage often remains hidden until you open up the affected area.
Always wear protective equipment during demolition. Safety goggles, gloves, and a respirator prevent inhalation of fungal spores and wood dust, both of which pose health risks. Bag and dispose of all rotted material immediately to prevent spores from spreading to other areas of your home.
Step 3: Apply Fungicide or Wood Preservative
With all rotted wood removed, treat the remaining exposed surfaces with fungicide to kill any lingering spores. This step prevents reinfection from dormant fungus that survived removal.
Choose the right product for your application. For interior repairs, borate-based treatments like Tim-Bor or Bora-Care effectively target fungi without excessive toxicity. For exterior projects, copper-based compounds or tebuconazole formulas penetrate deeper and provide superior weather resistance. Water-based preservatives work well indoors due to milder odor and lower VOC levels. Ensure you select a wax-free product if you plan to paint over the treated area, as wax or resin can interfere with paint adhesion.
Apply preservative thoroughly using a paintbrush or low-pressure sprayer. Saturate all exposed wood surfaces, extending treatment at least three feet beyond the affected area to neutralize residual spores. For thick wood (four inches or more), mix the treatment at a 1:1 ratio for better penetration. For thinner materials, use a 3:1 ratio.
If rot has spread to masonry surfaces—walls, foundations, chimney bases—treat those areas with a masonry biocide formulated to kill fungal growth on non-wood materials. This prevents the fungus from using these surfaces as a pathway to new timber.
Apply two or three generous coats of preservative, allowing each coat to dry completely before adding the next. Drying times vary by product and conditions but typically range from 24 to 72 hours. A 5-liter container of quality wood preservative costs $25 to $33.
Work safely with these chemicals. Wear gloves, safety goggles, and a respirator. Maintain good ventilation throughout the application and drying process. Keep preservative away from skin and eyes, and follow all manufacturer safety instructions. Once the wood is fully treated and dry, you are ready to reinforce weakened fibers.
Step 4: Strengthen the Wood with Hardener
Epoxy wood hardener penetrates deep into weakened wood fibers to create a solid foundation for filler. Skipping this step risks filler failure, as untreated wood lacks the structural integrity to support the repair long-term.
Start with a clean surface. Use a chisel or wire brush to remove any remaining debris, dust, or loose material. You need a stable base for the hardener to bond effectively. Safety gear remains essential—wear a respirator rated for organic vapors, safety goggles, long sleeves, and chemical-resistant gloves. Ensure adequate ventilation, as wood hardeners emit high levels of VOCs that are dangerous to inhale.
Apply hardener generously with a disposable foam brush. For deep voids, pour hardener directly into gaps and use a putty knife to work it into all cracks, holes, and exposed end grains. Continue applying until the wood stops absorbing liquid and remains saturated on the surface. Work in sections, as most hardeners remain workable for about 30 minutes before beginning to cure.
Let the hardener cure for 2 to 4 hours. It should feel hard to the touch before proceeding. Test with a sharp awl—properly hardened wood resists penetration. Once cured, sand the surface smooth with medium-grit sandpaper to remove any rough spots and prepare for filler application.
Material costs for small-scale repairs, including hardener, filler, and sandpaper, run $30 to $50. If dry rot affects structural components like floor joists, beams, or load-bearing walls, consult a professional before attempting repair. Structural damage requires engineering assessment and often needs permits for code-compliant work.
Step 5: Fill, Sand, and Paint the Repaired Area
With the wood hardened and stable, rebuild the damaged section using two-part epoxy filler. This final step restores the wood’s appearance and creates a weather-resistant barrier against future moisture.
Mix equal parts resin and hardener on a plastic surface until uniform. Work quickly—epoxy typically sets within 30 to 45 minutes. Using a plastic putty knife, press filler firmly into the cavity, eliminating air pockets that weaken the repair. Slightly overfill the area so you can sand it flush with the surrounding surface.
For deeper damage, anchor the epoxy with galvanized screws or broad-headed nails driven into solid wood below the repair. This provides structural support for large fills. On vertical surfaces or deep voids, create a temporary plywood form to hold epoxy in place during curing. The smoother you apply filler, the less sanding you will need after it cures.
Allow at least 4 hours for curing, though overnight is better for full strength. Once set, sand the repair smooth. Start with 80-grit sandpaper to remove excess material and level the surface. Progress to 100 to 120 grit to eliminate scratches, then finish with 220 grit for a paint-ready surface. Always sand with the grain. Clean thoroughly with a tack cloth to remove all dust.
Apply high-quality exterior-grade primer—acrylic or oil-based—to seal the epoxy and improve paint adhesion. This step is critical because epoxy degrades under UV exposure if left unprotected. Finish with two coats of 100 percent acrylic exterior paint for maximum weather resistance.
An 8-ounce epoxy kit, costing $25 to $35, covers approximately 14 cubic inches. For small to moderate repairs, this process not only restores appearance but also returns structural integrity to the wood. However, for extensive damage or repairs involving load-bearing members, professional help ensures safe, code-compliant work.
When Professional Repair Is Necessary
While many dry rot repairs are manageable for confident DIYers, certain situations demand professional expertise. Call in specialists when damage extends beyond 8 feet in length or affects multiple areas, rot has reached structural components like floor joists, wall studs, or beams, the affected area is difficult to access—upper stories, steep rooflines, enclosed crawl spaces—or you discover widespread softness across multiple walls or floors indicating systemic moisture problems.
Professional dry rot repair addresses the full scope of damage, not just visible symptoms. Contractors use moisture meters to identify the root cause, whether it is failed flashing, inadequate ventilation, or compromised drainage. They remove not only visible decay but also the buffer zone extending three feet beyond affected areas, ensuring complete fungal elimination.
Repair costs reflect the extent of work required. Minor repairs run $350 to $950, moderate repairs $950 to $2,500, structural repairs $2,500 to $6,500, and complex multi-area projects $6,500 to $15,000 or more. While these numbers seem substantial, they pale compared to the cost of ignoring dry rot. Unaddressed fungal decay spreads rapidly in Seattle’s damp climate, eventually compromising structural integrity and requiring far more extensive—and expensive—remediation.
Acting quickly when you notice signs of dry rot—soft wood, musty smells, cubical cracking, spongy floors—prevents minor issues from becoming major structural problems. For a thorough assessment and expert repair, call (425) 517-1751 to schedule an inspection with experienced Seattle-area contractors who understand the Pacific Northwest’s unique moisture challenges.
Not sure how bad yours is?
Send a photo or describe the spot over the phone. We will tell you whether it is a patch, a section, or something structural before anyone comes out.
Mon–Fri, 7:00am – 5:00pm
Questions homeowners ask us about this
How can I tell if it is dry rot or wet rot?
How far can dry rot spread beyond the visible damage?
When should I stop DIY and call a professional for dry rot?
How much does professional dry rot repair cost in Seattle?
Read next
- Dry Rot
What Causes Dry Rot in Pacific Northwest Homes?
Understand what causes dry rot in Seattle homes, from persistent rain to poor ventilation, and how to prevent structural damage with proven strategies.
- Trim Repair
Ultimate Guide to Preventing Trim Rot
Prevent trim rot in Seattle's damp climate with the right materials, proper installation techniques, and a maintenance routine that works.
- Dry Rot
Dry Rot Prevention vs. Repair Costs in Seattle
Annual dry rot prevention costs $200-$500 in Seattle. Repairs run $1,500-$100,000+. Learn why prevention saves thousands in King County's wet climate.
Get a straight answer on your siding, trim, or rot
Free estimate, no obligation, and usually a slot the same week. We cover Seattle, Bellevue, Redmond, Kirkland, Bothell, and Tacoma.
Mon–Fri, 7:00am – 5:00pm · Free estimates · Same-week scheduling