
Dry Rot & Siding Replacement: Seattle Homeowner's Guide
Seattle's 155 rainy days drive dry rot behind siding. Learn inspection methods, repair vs. replace decisions, costs, and moisture prevention strategies.
By Seattle Trim Repair · Published · Updated
Dry rot is a wood-decaying fungus that thrives in Seattle’s wet climate, weakening siding and structural framing from the inside. Installing new siding over rotted wood does not stop the decay; it accelerates hidden damage that can cost ten times more to repair later.
Seattle’s 155 annual rainy days and limited drying opportunities create ideal conditions for dry rot to spread from small siding cracks to major structural problems within a single wet season. Here is how to inspect for hidden rot, decide between repair and replacement, and prevent future decay after siding installation.
Understanding Dry Rot in the Pacific Northwest
Dry rot fungus breaks down cellulose in wood, creating soft, discolored areas that compromise structural strength. The process begins when moisture becomes trapped behind siding through cracks, failed caulking, or peeling paint. What appears as minor cosmetic damage often masks serious decay in hidden areas behind siding or trim.
Seattle’s climate amplifies the problem. With 37 inches of annual rainfall distributed across 155 wet days, exterior wood remains continually exposed to moisture. High humidity and overcast skies limit evaporation, keeping wood damp for extended periods.
Wind-driven rain pushes moisture behind lap siding, corner boards, and trim joints. Homes with older wood siding, minimal roof overhangs, or shaded north-facing walls face the highest risk. Shaded areas receive less sunlight to aid drying, allowing decay to progress continuously in unprotected zones.
Seattle’s mild year-round temperatures prevent wood from freezing, so decay never pauses. Unlike regions with harsh winters that temporarily halt fungal growth, Pacific Northwest rot progresses through all seasons.
Common Locations for Siding Dry Rot
Water pooling or lingering creates ideal conditions for rot. Window and door trim are primary targets. Water running down glass collects on horizontal sills and seeps behind trim boards through caulking gaps.
Bottom siding rows near ground level stay damp longer due to reduced air circulation and limited sunlight. Splash-back from soil or hard surfaces keeps these boards wet, accelerating decay.
Trim around rooflines, eaves, and fascia boards trap water running off the roof. These high-exposure areas often show the first visible signs of rot.
Watch for soft, crumbling wood, dark streaks, and peeling paint in these zones. If left unchecked, damage spreads from siding to structural elements like sheathing and framing, leading to repairs costing $5,000 to $20,000 or more.
Inspection Methods for Hidden Rot
A thorough inspection before siding replacement prevents costly surprises. Installing new siding over damaged sheathing or framing allows decay to continue spreading beneath the surface, shortening the lifespan of new materials and creating structural issues far more expensive to repair later.
Visual Inspection Look for peeling or blistering paint, discoloration, dark stains, and cracks indicating trapped moisture. Warped or bulging boards, recurring caulk failures, and soft edges around trim signal potential rot. Fungal growth or mildew patterns may point to hidden decay within wall cavities.
Tactile Testing Use an awl or screwdriver to probe suspect areas, especially lower siding, trim boards, and corners around windows or doors. Healthy wood resists penetration and feels solid. Rotted wood feels spongy, crumbles easily, or allows the tool to sink in without resistance.
Moisture Measurement Moisture meters identify damp areas that may not yet show visible damage. Readings above 20 percent moisture content indicate conditions promoting rot and warrant further investigation or small test openings before siding replacement begins.
Many Seattle contractors now include moisture diagnostics as standard in pre-siding-replacement inspections. This helps catch hidden issues early and provides accurate project estimates.
Critical Inspection Areas
Focus on spots where water collects, lingers, or seeps behind protective barriers:
Lower Siding Near Grade Splash-back from soil or hard surfaces keeps these areas wet longer. Siding touching the ground or sitting within two inches of grade is a red flag. Look for wicking lines and decay around nail holes suggesting moisture creeping upward from the foundation.
Window and Door Perimeters Probe these areas carefully and verify that flashing above openings properly directs water away from wall cavities. Missing or damaged flashing is a primary moisture intrusion pathway.
Roof-to-Wall Intersections Verify step flashing is correctly lapped where roofs meet walls and that kick-out flashing channels water into gutters instead of down siding. Chimney and skylight transitions require close attention as they commonly leak over time.
Deck and Porch Attachments Moisture often traps where ledger boards connect to the house. Check for proper metal or membrane flashing and test for soft wood around fasteners.
Downspout Discharge Points Water near walls can saturate siding if not directed away from the foundation. Examine these areas for signs of chronic moisture exposure on nearby siding and trim.
Once old siding is removed, assess the condition of weather-resistant barriers and sheathing underneath. Torn, improperly installed, or missing house wrap allows water to reach sheathing. Stained, swollen, or crumbling sheathing panels indicate prolonged moisture exposure.
In Seattle, north- and west-facing walls often show more moisture damage due to wind-driven rain and limited sunlight. Significant softness around windows, doors, or corner boards often prompts contractors to open areas further to check for compromised framing.
Repair vs. Replacement Decisions
When inspection reveals dry rot, decide whether to patch affected areas or replace entire sections. The decision hinges on damage extent and structural impact.
When to Patch Patching works for small, surface-level rot that does not compromise structural integrity. Damage confined to trim boards, corner boards, or specific siding spots where sheathing and framing remain intact qualifies.
In Seattle, patchable rot often appears near window sills, around fastener holes, or along lower siding edges where splash-back caused minor decay. If probing reveals shallow damage with firm wood underneath, patching is practical.
Remove all decayed wood, stabilize remaining fibers with penetrating wood hardener, rebuild missing areas with exterior epoxy filler, then sand, prime, and paint to match surrounding siding.
Small repairs typically cost $200-500 for easily accessible areas with minor damage. Slightly larger repairs range from $585-1,096 depending on extent and accessibility.
Patching only works when damage is isolated. If probing reveals rot extending beyond visible areas or soft, spongy wood, full replacement is safer and more reliable.
When Full Replacement Is Necessary Replace when dry rot affects structural components, large wood portions have lost strength, or moisture problems are widespread. Structural elements like rim joists, wall studs, or sheathing panels cannot be patched; they must be replaced to restore wall strength and weather resistance.
If damage spreads several inches beyond visible areas, or if sheathing is swollen, stained, or crumbling, full replacement is required. Extensive rot often points to chronic moisture issues from failed flashing, missing weather barriers, or leaks around windows, doors, or roof joints.
Remove all compromised siding and trim, cut out rotten sheathing and framing, treat surrounding wood with fungicide or borate, and install pressure-treated lumber and structural panels. Add weather-resistant barriers and proper flashing around openings before installing new siding and trim.
Moderate to extensive rot repairs including damaged sheathing and framing cost $1,000 to $12,000-plus depending on home size, location, and scope.
In Seattle’s damp climate, contractors pay close attention to moisture sources like wind-driven rain, gutter overflows, and shaded walls that dry slowly. They often recommend improved flashing, moisture-resistant materials, and framing or trim adjustments to prevent future rot.
Preventing Dry Rot After Installation
Proper Installation Practices Install siding 6-8 inches above soil, mulch, or hard surfaces. This clearance prevents rain splash and allows air circulation to help walls dry faster.
Use flashing to redirect water away from vulnerable areas. Head flashing above windows, Z-flashing at horizontal breaks, and kick-out flashing where roofs meet walls all work together to keep water out. In Seattle, step flashing at roof-to-wall intersections is critical to protect against wind-driven rain.
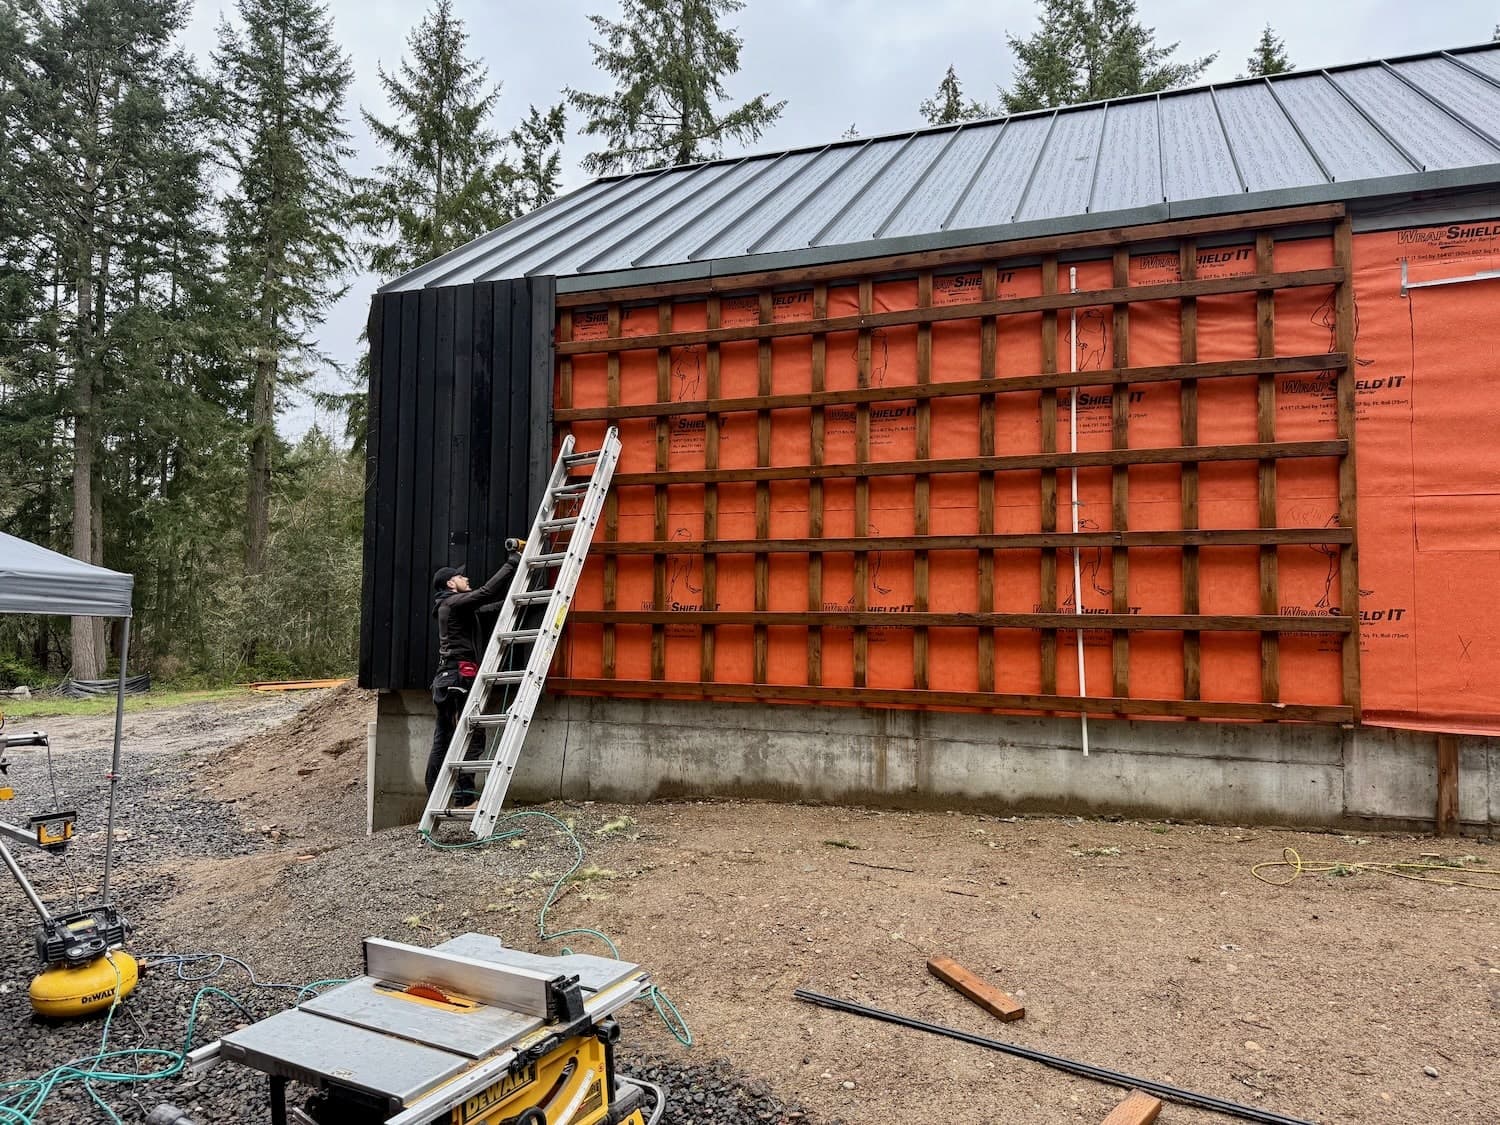
Apply continuous weather-resistant barriers like house wrap, properly lapped to direct water downward and integrated with flashing tapes around windows and doors. In high-rainfall areas, rainscreen systems with furring strips or drainage mats create air gaps behind siding, helping walls dry faster after storms.
Prime all wood surfaces including cut ends and nail holes. Use high-quality exterior caulk on joints and penetrations. Apply at least two coats of exterior-grade paint or stain and follow recommended repainting schedules, typically every 5-10 years.
Slope horizontal trim and ledger boards away from the house to prevent water pooling. Ensure proper drainage and ventilation behind siding, especially when manufacturers recommend rainscreen systems.
Regular Maintenance Inspect at least twice yearly. Check lower siding, trim, roof-wall transitions, and gutter areas for peeling paint, soft spots, failed caulking, or water stains. Probe suspect areas gently with a screwdriver to verify underlying wood remains solid.
Reapply caulk at joints where siding meets trim, corners, windows, doors, and exterior penetrations like vents or fixtures. Remove old, cracked caulk and replace with high-quality exterior-grade sealant. Do not seal drainage paths; walls need to shed water.
Follow manufacturer repainting recommendations, usually every 5-10 years for wood or engineered wood siding. Areas exposed to weather wear faster.
Keep gutters and downspouts clear to prevent overflow. Extend downspouts to direct water away from the foundation. Adjust sprinklers to avoid spraying siding and address roof leaks promptly.
Small fixes save big money. Replace cracked boards, loose trim, or failed caulk immediately. Tiny cracks allow moisture to reach sheathing or framing where rot causes serious damage.
Cost Planning and Timeline Expectations
Minor Localized Rot Costs: $200-1,000 Timeline: Adds 1-2 days to project Scope: Removing a few boards, treating or replacing small sheathing areas, installing new siding or trim
Moderate Damage Costs: $2,000-4,000 Timeline: Adds several days to a week Scope: Replacing sheathing sections, fixing multiple studs, addressing moisture issues. Water damage and rot repair alone can cost $700-3,000 additional to standard siding work.
Severe Structural Rot Costs: $5,000-10,000 or more Timeline: Adds a week or more Scope: Rebuilding entire wall sections, replacing rim joists, extensive framing damage. Often requires coordination with structural engineers and building inspectors.
Full siding replacement in Seattle for an average home typically ranges from $10,000 to $25,000 depending on materials and complexity.
Set aside an additional 10-25 percent of your siding estimate as contingency for hidden damage that appears worse than initially visible.
Weather affects timelines. Schedule work during Seattle’s drier months in summer and early fall to prevent delays and ensure wall assemblies dry properly.
Choosing Materials for Seattle’s Climate
Fiber Cement Cost: $6-15 per square foot installed Lifespan: 25-50 years Highly resistant to moisture, rot, and pests. Does not absorb water, so it will not swell, warp, or rot even during Seattle’s rainiest months. Top choice for wet climates.
Primed Cedar Cost: $5-15 per square foot Lifespan: 15-25 years with proper maintenance Factory-applied primer provides moisture barrier but requires regular repainting or restaining to prevent rot. Routine maintenance necessary.
Engineered Wood Cost: $5-15 per square foot Lifespan: 15-25 years Combines treated wood fibers with resins for stability. Better than untreated wood but requires regular inspections and maintenance around joints and trim.
Metal Siding Cost: $6-10 per square foot Lifespan: 20-40 years Highly moisture-resistant, will not rot. Particularly effective for soffit repairs in Seattle where moisture collects in overhangs and eaves.
Weigh initial costs against long-term maintenance. Expert installation tailored to Seattle’s climate ensures materials perform as designed.
For comprehensive dry rot inspections and siding replacement throughout King County, contact Seattle Trim Repair at (425) 517-1751 for a free assessment.
Not sure how bad yours is?
Send a photo or describe the spot over the phone. We will tell you whether it is a patch, a section, or something structural before anyone comes out.
Mon–Fri, 7:00am – 5:00pm
Questions homeowners ask us about this
What are the first signs of dry rot to look for before replacing siding?
Why is fiber cement siding better for Seattle's wet climate than wood?
What is the cost difference between repairing dry rot and replacing siding?
How do I prevent dry rot after siding replacement in Seattle?
Read next
- Dry Rot
What Causes Dry Rot in Pacific Northwest Homes?
Understand what causes dry rot in Seattle homes, from persistent rain to poor ventilation, and how to prevent structural damage with proven strategies.
- Dry Rot
Dry Rot Prevention: Best Siding for Seattle Homes
Protect your Seattle home from dry rot by choosing the right siding material and ensuring proper installation and maintenance.
- Dry Rot
Dry Rot Prevention vs. Repair Costs in Seattle
Annual dry rot prevention costs $200-$500 in Seattle. Repairs run $1,500-$100,000+. Learn why prevention saves thousands in King County's wet climate.
Get a straight answer on your siding, trim, or rot
Free estimate, no obligation, and usually a slot the same week. We cover Seattle, Bellevue, Redmond, Kirkland, Bothell, and Tacoma.
Mon–Fri, 7:00am – 5:00pm · Free estimates · Same-week scheduling