
Dry Rot Prevention with Cedar Sealers: Seattle Guide
How eco-friendly water-based cedar sealers prevent dry rot, block moisture and UV, and how to prep, apply, and maintain siding in Seattle's damp climate.
By Seattle Trim Repair · Published · Updated
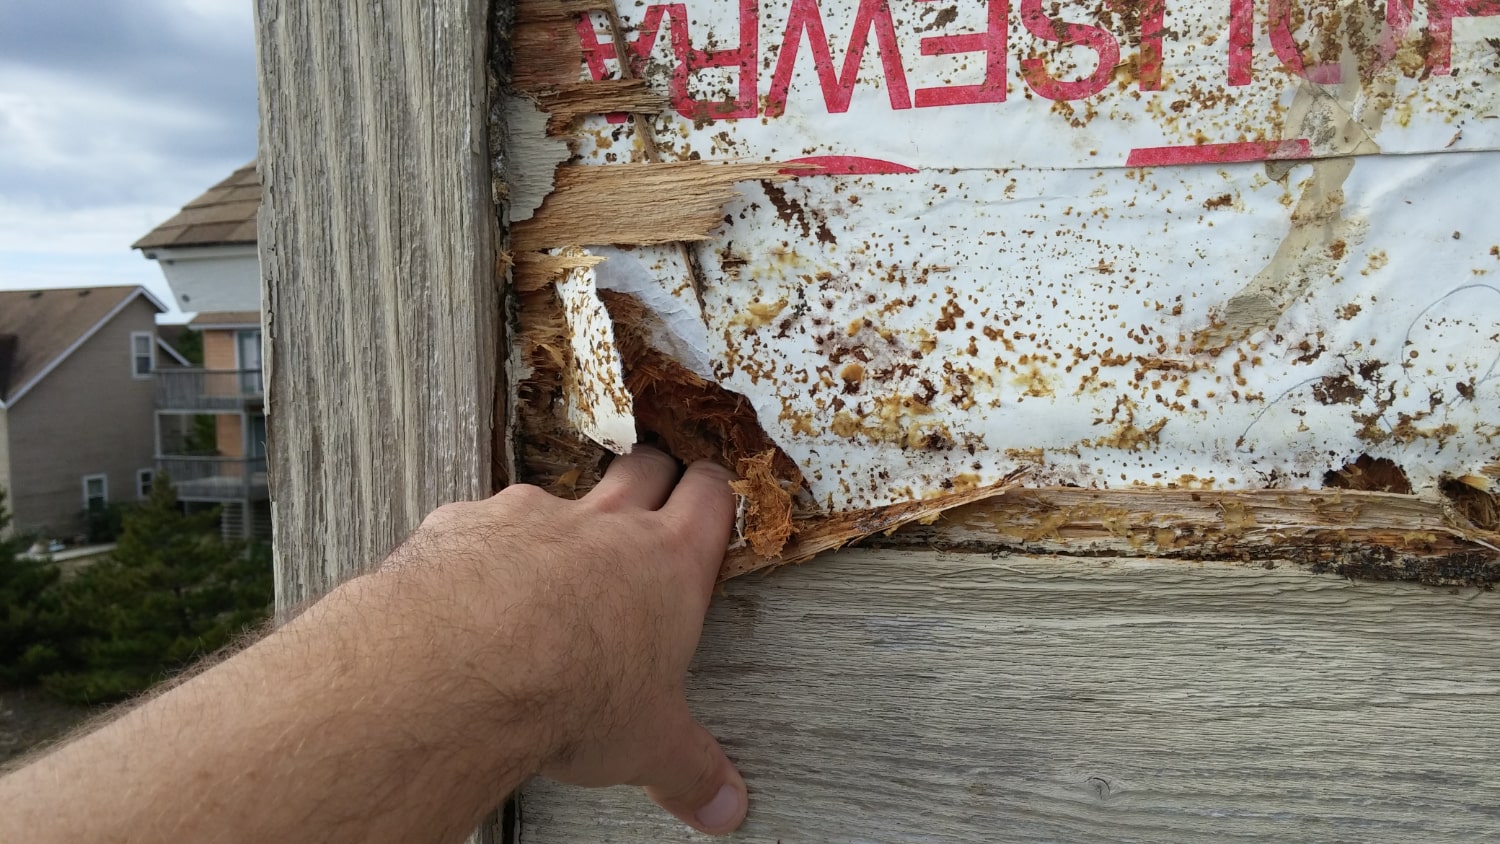
Dry rot is one of the most destructive forces facing cedar siding in Seattle. The fungus Serpula lacrymans thrives in the Pacific Northwest’s damp conditions, where high humidity and over 150 rainy days annually create the perfect environment for fungal growth. Once dry rot takes hold, it weakens wood by breaking down cellulose, leading to structural damage that can cost thousands to repair.
Cedar, while naturally resistant to decay, becomes increasingly vulnerable over time as its protective oils diminish from weather exposure. Eco-friendly cedar sealers offer a practical defense by creating a breathable barrier that repels water, prevents moisture buildup, and protects against UV damage, mold, and mildew—all without harming the environment.
This guide covers everything Seattle homeowners need to know about preventing dry rot with cedar sealers: how to choose the right product, properly prepare and apply it, and maintain cedar siding to ensure it remains durable and rot-free for decades.
Understanding Dry Rot in Cedar Siding
Dry rot begins when spores of the fungus Serpula lacrymans land on wood with a moisture content above 20%. The spores germinate and develop thread-like hyphae that penetrate deep into the wood, breaking down cellulose and hemicellulose—the structural components that give wood its strength. Over time, the fungus forms a spreading network called mycelium, which can eventually produce a fruiting body capable of releasing millions of additional spores.
What makes dry rot particularly dangerous is its ability to spread through non-wood materials like brick, plaster, and soil, allowing it to reach fresh timber sources throughout your home. In Seattle’s damp climate, factors like clogged gutters, poor ventilation, and improper grading trap moisture against siding, creating ideal conditions for this fungus to flourish.
Why Cedar Needs Protection
Cedar contains natural oils that provide some initial resistance to decay and insects. However, prolonged sun exposure dries out cedar, causing cracks and splits that allow moisture to penetrate. Once water enters, Seattle’s consistently high humidity prevents proper drying, especially during the wettest months from November through February when rain is frequent and drying time is minimal.
Without protection, cedar becomes increasingly susceptible to dry rot. Applying an eco-friendly sealer enhances cedar’s natural resilience, filling the pores to prevent moisture intrusion while allowing the wood to breathe and release any trapped vapor.
Benefits of Eco-Friendly Cedar Sealers
Modern eco-friendly cedar sealers use advanced formulations that protect wood without the toxic chemicals found in traditional products.
Penetrating Protection with Nanotechnology
Unlike surface coatings that can crack or peel, penetrating sealers use nanotechnology to sink deep into the wood, creating a breathable barrier. This barrier allows water vapor to escape while blocking liquid water, preventing the internal moisture buildup that leads to dry rot.
Comprehensive Protection
Eco-friendly sealers protect against multiple threats: they prevent mold, mildew, and wood-decaying fungi from taking hold; offer UV protection that reduces sun damage and keeps wood more resistant to moisture over time; and feature ultra-low VOC formulations that are safe for children, pets, and plants.
According to the EPA, VOC levels inside homes can be 2 to 5 times higher than outdoor levels when traditional sealers are used. Modern water-based, ultra-low VOC sealers match or exceed the durability of traditional toxic formulas without exposing your family to dangerous fumes.
Durability and Maintenance
High-quality eco-friendly sealers can protect vertical surfaces like cedar siding for up to 10 years. Cleanup is simple, requiring just soap and water. With around 80% of wood finishes still containing toxic VOCs, switching to eco-friendly options is both safer and more environmentally responsible.
Recommended Eco-Friendly Cedar Sealers
Several products stand out for protecting cedar while preventing dry rot in Seattle’s climate:
Seal-Once Nano+Poly combines nanotechnology with polyurethane for superior UV and abrasion resistance. It offers up to 10 years of protection for vertical surfaces and has been rated “Best Overall” by independent testers. While it comes with a higher price tag, its durability and performance justify the investment.
Eco Advance Exterior Wood Water Repellent is a top choice for non-toxic formulations. It’s safe to use near landscaping and has earned recognition as the “Best Eco-Friendly” sealer on the market.
Olympic WaterGuard Clear Wood Sealer provides a budget-conscious option with single-coat application, though it may need reapplication more frequently than premium alternatives.
Rain Guard Natural, sold as a concentrate that can be diluted to make up to 2 gallons, is ideal for larger projects where cost-effectiveness matters.
For Seattle homeowners dealing with constant moisture exposure, choosing a penetrating, nano-technology-based sealer is essential. These products allow cedar to breathe while protecting it from the fungal growth that leads to costly dry rot repairs.
Preparing Cedar Siding for Sealer Application
Proper preparation ensures the sealer can penetrate effectively and provide maximum protection against dry rot.
Cleaning Cedar Siding
Start by removing loose debris with a long-handled scrub brush or broom. Then clean the surface using oxygen bleach (sodium percarbonate), which lifts stains and kills mildew without stripping cedar’s natural oils or damaging its fibers.
Mix 1 cup of powdered oxygen bleach with 1 gallon of warm water, adding a small amount of eco-friendly dish soap to help the mixture adhere to vertical surfaces. Apply the solution using a low-pressure garden sprayer, working in 4×8-foot sections. Let it sit for 10 to 15 minutes, scrub with a soft-bristle brush attached to an extension pole, and rinse thoroughly with a garden hose.
Before starting, protect nearby plants by soaking them with fresh water or covering them with plastic sheeting. Avoid wire brushes or steel wool, as metal deposits can react with cedar’s tannins and leave permanent black stains. Never use pressure washers or chlorine bleach, which can harm wood fibers.
Inspecting for Dry Rot
Focus on shaded areas, window trim, and fascia boards—spots most prone to dry rot. Use a flathead screwdriver to probe the wood. Healthy cedar feels firm; if the screwdriver sinks in easily or the wood crumbles into brittle pieces, that section needs replacement before sealing.
Watch for telltale signs: cubical cracking (a grid-like pattern of deep cracks), white fungal threads, or discolored spongy areas. Pay extra attention to end grains of cedar boards, which absorb water more easily and are highly susceptible to rot. In Seattle, frequent freeze-thaw cycles can create cracks that trap water and accelerate decay.
Check caulking around windows and doors. If it’s cracked or pulling away, moisture could be seeping behind the siding. Replace any damaged boards or trim before sealing—for extensive damage, consider professional inspection and repair.
Allowing Proper Drying Time
Cedar siding must be completely dry before applying sealer. Allow at least 48 hours of drying time, or up to four days in humid conditions, until the wood’s moisture content is below 20%—ideally 15% or less. Applying sealer to damp wood traps moisture inside, encouraging fungal growth and causing the finish to peel, blister, or flake prematurely.
Plan your project for the driest months, ideally when temperatures range between 50°F and 90°F. In the Pacific Northwest, mid-July through early September usually provides the best conditions. Before sealing, confirm the wood feels dry to the touch and shows no dampness in cracks or joints.
Applying Cedar Sealers
Proper application ensures your cedar siding receives maximum protection against moisture and dry rot.
Testing the Sealer
Before sealing the entire house, test the product on a small, hidden section of siding—perhaps behind a downspout or another inconspicuous area. Follow the manufacturer’s instructions and allow the sealer to dry completely, typically 24 to 48 hours depending on temperature and humidity.
Check the test area under different lighting throughout the day. Water-based sealers tend to appear lighter, while oil-based ones can deepen the wood’s natural color. If the finish looks uneven or blotchy, the cedar may need further cleaning or the product may not be a good match.
Applying the First Coat
Use a quality brush for grooves and edges, along with a roller or sprayer for larger areas. Brushes are especially useful for sealing vulnerable spots like grooves, joints, edges, and board ends—areas most prone to moisture absorption.
Work systematically in 4×8-foot sections to maintain a wet edge and avoid lap marks. Apply the sealer in thin, even coats, always following the wood grain. Pay extra attention to board ends and joints, as these absorb moisture most readily.
Plan your project for temperatures between 50°F and 90°F, with no rain expected for at least 24 to 48 hours. In the Pacific Northwest, mid-July through early September typically offers the best weather for sealing.
Adding a Second Coat
The second coat provides an additional layer of defense against moisture and UV rays. Let the first coat dry completely before applying the next—typically 40 to 50 minutes for water-based sealers and about 4 hours for oil-based options. Always check the manufacturer’s guidelines, as applying the second coat too early can interfere with proper curing.
Use the same method as before: thin, even strokes following the wood grain. You may notice the wood absorbs less sealer during the second coat, which is normal. Ensure coverage is consistent and avoid over-application.
After finishing, keep the siding away from moisture for at least 48 hours to allow the sealer to cure fully. High-quality sealers usually need reapplication every 3 to 5 years, depending on sun and weather exposure.
Maintaining Cedar Siding to Prevent Dry Rot
Once sealed, regular maintenance is essential to prevent dry rot from taking hold in Seattle’s challenging climate.
Annual Inspections and Maintenance
Set aside time twice yearly—spring and fall—for thorough siding inspections. These regular checks help catch potential issues early. Pay extra attention to shaded or north-facing areas, which are more prone to dry rot.
Use the screwdriver test to probe suspect wood. If it feels soft or the tool sinks in, dry rot may be developing. The sprinkle test is equally useful: splash a small amount of water on the siding. If it beads up, the seal is effective. If it absorbs quickly, it’s time to reseal.
Focus on areas where water tends to collect: around windows, doors, and board ends. Check caulking to ensure it’s intact and flexible—cracked caulking allows moisture to seep into the wood. In the Puget Sound area, cedar siding typically needs resealing every 1 to 3 years.
Spot-Cleaning and Minor Repairs
Clean your siding annually using a gentle cleanser and soft brush or low-pressure hose to remove dirt and debris. Avoid high-pressure washing, which can damage wood fibers and force water into the siding. Rinse thoroughly after cleaning.
For minor damage, act quickly. Fill small cracks with food-grade silicone to block moisture. Replace loose boards and remove nearby vegetation that holds moisture against the wood. Clean gutters at least twice yearly—clogged gutters overflow and spill water onto fascia boards and siding, accelerating rot.
Professional Dry Rot Inspection and Repair
If you notice concerning signs during inspections—soft spots, cubical cracking, or a damp mushroom-like odor—call a professional immediately. Dry rot spreads quickly and often requires removing damaged wood along with a buffer zone of up to 3 feet to ensure complete eradication.
Catching dry rot early can save tens of thousands of dollars compared to full structural remediation. Professional inspections use moisture meters and specialized tools to detect hidden damage before it becomes a major structural problem.
Protecting Your Investment
Preventing dry rot in Seattle’s damp climate requires a combination of proper sealer selection, careful application, and consistent maintenance. Eco-friendly water-based sealers create a breathable barrier that keeps moisture levels below the critical 20% threshold where dry rot takes hold.
By following the preparation, application, and maintenance steps outlined in this guide, you can protect your cedar siding from the destructive effects of dry rot while maintaining its natural beauty for decades. The investment in quality sealers and regular upkeep is minimal compared to the cost of repairing or replacing rot-damaged siding and structural framing.
For professional guidance on cedar siding maintenance or dry rot prevention in the Seattle area, contact a local specialist who understands the unique challenges of protecting wood in the Pacific Northwest’s wet climate.
Not sure how bad yours is?
Send a photo or describe the spot over the phone. We will tell you whether it is a patch, a section, or something structural before anyone comes out.
Mon–Fri, 7:00am – 5:00pm
Questions homeowners ask us about this
How can I tell if my cedar siding already has dry rot?
What is the best time of year to seal cedar siding in Seattle?
How often should I reseal cedar siding in Seattle?
Read next
- Siding Repair
How to Maintain Cedar Siding in Seattle's Wet Climate
Seattle's 155 rainy days demand cedar siding maintenance. Learn cleaning, sealing, inspection schedules, and moisture control to prevent dry rot.
- Dry Rot
What is Dry Rot and Why It's a Problem in Seattle Homes
Learn what dry rot is and why Seattle homes are vulnerable. Spot it early, prevent costly damage—get expert guidance from Seattle dry rot specialists.
- Dry Rot
What Causes Dry Rot in Pacific Northwest Homes?
Understand what causes dry rot in Seattle homes, from persistent rain to poor ventilation, and how to prevent structural damage with proven strategies.
Get a straight answer on your siding, trim, or rot
Free estimate, no obligation, and usually a slot the same week. We cover Seattle, Bellevue, Redmond, Kirkland, Bothell, and Tacoma.
Mon–Fri, 7:00am – 5:00pm · Free estimates · Same-week scheduling