
7 Siding Installation Mistakes to Avoid in Seattle
Common siding installation errors lead to costly water damage and rot in Seattle homes. Learn the critical mistakes and how to prevent them.
By Seattle Trim Repair · Published · Updated
Siding installation in Seattle is not just about appearance and curb appeal. In a climate that delivers 37 inches of annual rainfall spread across 155 rainy days, siding installation errors create pathways for water intrusion that lead to thousands of dollars in rot repairs within a few years. Small mistakes during installation compound over time as freeze-thaw cycles, wind-driven rain, and persistent dampness exploit every gap, poorly sealed joint, and improper detail.
The most expensive siding failures are not visible from the outside. Water that enters behind siding saturates sheathing and framing, where it stays trapped without adequate ventilation. By the time homeowners notice interior water stains or exterior paint failure, the hidden damage often requires removing large sections of siding to access and repair rotted framing. Understanding and avoiding the seven most common installation mistakes protects your investment and ensures that your siding performs as the weathertight barrier it is designed to be.
1. Poor Surface Preparation
Proper siding installation begins before the first panel goes up. The substrate must be sound, dry, and properly prepared. Skipping this step locks problems into the wall assembly that will cause failures for years.
Failing to Inspect and Repair Sheathing
Removing old siding often reveals rotted or water-damaged sheathing underneath. Installing new siding over compromised sheathing traps decay in the wall cavity and ensures that the problem will continue to spread. All damaged sheathing must be removed and replaced with sound material before new siding is installed.
In Seattle, sheathing damage is common on north-facing walls, under failed window flashing, and near grade where splash-back and poor clearance have allowed prolonged moisture exposure. A thorough pre-installation inspection using a moisture meter identifies these areas before they are covered.
Installing Over Uneven Surfaces
Siding installed over wavy or uneven sheathing looks poor and performs worse. Uneven substrate causes siding to appear rippled or bowed, and gaps between the siding and sheathing allow wind-driven rain to penetrate. Flat, even sheathing is essential, particularly for fiber cement and engineered wood products that are rigid and do not conform to substrate irregularities.
Skipping Weather-Resistant Barriers
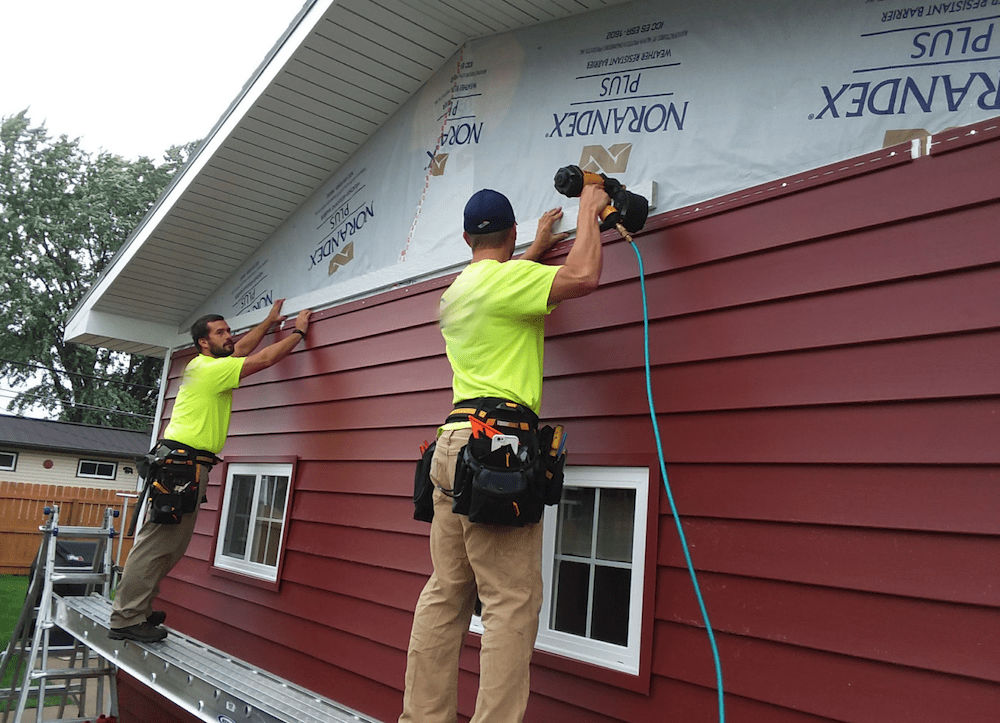
Building wrap or house wrap is not optional. It is the primary drainage plane that directs water that gets behind siding downward and out of the wall cavity. The barrier must be installed in a shingle-lap pattern, with each course overlapping the one below it by at least 6 inches, and all seams sealed with manufacturer-approved tape.
In Seattle’s climate, even premium siding will fail without a proper weather-resistant barrier because wind-driven rain penetrates siding joints and lap seams. The barrier catches this water and channels it out before it reaches sheathing.
2. Incorrect Fastening
Fastening errors are among the most common installation mistakes, and they lead to warping, buckling, and loose panels that fail prematurely.
Over-Driven Fasteners
Driving nails too tight locks siding in place, preventing the natural expansion and contraction that occurs with temperature and moisture changes. When siding cannot move, it warps, cracks, or buckles. Fiber cement siding driven too tight develops stress cracks at fastener locations. Vinyl and engineered wood siding buckle and deform.
Proper fastening leaves a small gap, approximately 1/32 inch, between the nail head and the siding surface. This floating attachment allows the panel to expand and contract freely.
Under-Driven Fasteners
Nails that do not seat firmly leave panels loose and prone to wind damage. Loose siding rattles in wind, and gaps open at joints. Under-driven fasteners also fail to compress siding properly against the substrate, allowing water to wick behind panels.
Fastening Into Sheathing Only
Siding fasteners must penetrate framing, not just sheathing. Nails driven only into 7/16-inch OSB sheathing lack holding power and pull out over time. All siding fasteners should penetrate studs or blocking at least 1.5 inches to provide adequate withdrawal resistance.
Using Inappropriate Fasteners
Electroplated or galvanized fasteners that are not hot-dipped corrode in Seattle’s damp climate, leaving rust stains on siding and failing structurally. Hot-dipped galvanized or stainless steel fasteners are required for long-term performance. Fastener type also matters: ring-shank nails provide better holding power than smooth-shank nails in engineered wood and fiber cement applications.
3. Missing or Faulty Moisture Barriers
Siding is cladding, not a waterproof membrane. It sheds most water, but wind-driven rain penetrates lap joints and end seams in even the best installations. The weather-resistant barrier behind the siding is the true moisture protection.
Improperly Lapped Seams
Barrier seams that are not lapped correctly allow water to bypass the barrier and reach sheathing. Each horizontal seam must lap like shingles, with the upper course overlapping the lower course. Vertical seams should overlap by at least 6 inches and be taped.
Failing to Seal Penetrations
Every penetration through the barrier, including electrical boxes, plumbing vents, and exterior lights, must be sealed. Unsealed penetrations are direct pathways for water into wall cavities. Flexible flashing tape or boots designed for specific penetrations provide reliable seals.
Skipping Drainage Planes
Building wrap alone is not sufficient in climates with persistent rain. A drainage plane or rainscreen creates an air gap between the siding and the barrier, allowing water to drain downward and air to circulate. This ventilation dries moisture that penetrates the siding before it can saturate sheathing.
Drainage planes can be created with vertical furring strips, dimpled drainage mats, or specialized rainscreen products. The investment is modest compared to the long-term benefit of keeping sheathing dry.
4. Improper Flashing Around Windows and Doors
Windows and doors are the most common locations for water intrusion in Seattle homes. Proper flashing installation is non-negotiable.
Relying on Caulk Instead of Flashing
Caulk degrades from UV exposure and temperature cycling. It is not a substitute for mechanical flashing that overlaps and sheds water. Proper flashing includes sill pan flashing under the window, head flashing above, and jamb flashing at the sides, all installed in a lapped sequence that directs water outward.
Incorrect Flashing Sequence
Flashing must be installed from the bottom up, with each piece overlapping the one below it. Sill pan flashing goes in first, then jamb flashing that laps over the pan, then head flashing that laps over the jambs. Reversing this sequence allows water to run behind flashing and into the wall.
Missing Kickout Flashing
Where a roof edge terminates into a vertical wall, kickout flashing is required to direct water away from the wall and into the gutter. Without kickout flashing, roof runoff flows directly behind siding, saturating sheathing and causing extensive hidden rot.
5. Not Allowing for Expansion and Contraction
All siding materials expand and contract with temperature and moisture changes. Failing to accommodate this movement causes damage.
Insufficient Expansion Gaps
Vinyl siding expands significantly with heat. Panels installed without gaps at trim and J-channel buckle in hot weather. Engineered wood products like LP SmartSide absorb moisture during acclimation and require a minimum 3/16-inch gap at all butt joints and where siding meets trim. Fiber cement shrinks slightly during curing and requires no gap, but installers must follow manufacturer specifications for each product.
Nailing at the Ends of Slots
Vinyl siding has elongated nail slots to allow movement. Nails driven at the slot ends lock the panel in place. Fasteners must be centered in the slot and not driven tight, allowing the panel to slide as it expands and contracts.
6. Crooked or Misaligned Siding
The first course of siding sets the alignment for every course above it. If the starter strip is not level, every subsequent row drifts in the same direction, creating visible misalignment and gaps.
Ignoring Level on Starter Strips
Use a level to establish the starter strip position. Mark a chalk line for the full run and verify level before fastening. A starter strip that is off by 1/4 inch at one end will be off by several inches at the top of a two-story wall.
Improper Overlaps
Lap siding must overlap consistently, typically 1 to 1.25 inches. Overlaps beyond this create a wavy appearance. Insufficient overlap allows water penetration. Maintain consistent overlap throughout the installation by using a gauge or spacer.
Misaligned Vertical Seams
Vertical seams should be staggered and placed over studs when possible. Seams that stack vertically create weak lines where water can penetrate and structural strength is reduced. Stagger seams by at least 24 inches between courses.
7. Incorrect J-Channel and Trim Installation
J-channel and trim provide finished edges and direct water away from vulnerable joints. Poor installation turns them into water entry points.
Mitering Inside Corners
Inside corners should use J-channel corner posts, not mitered joints. Mitered corners leave gaps that allow water and pests to enter. Corner posts provide a clean, sealed edge.
Fastening Through Siding
Fasteners should never penetrate both trim and siding. Trim should be fastened to framing independently, and siding should terminate into the trim channel with proper clearance for expansion. Nailing through both materials restricts movement and causes buckling.
Inadequate Clearance at J-Channel
Siding panels must have at least 1/4 inch clearance inside J-channel to allow for expansion. In cold weather or with materials prone to expansion, increase this gap to 3/8 inch. Panels that fit tightly in J-channel will buckle when they expand.
Seattle-Specific Installation Considerations
Seattle’s climate requires additional attention to details that may be less critical in drier regions.
Minimum clearance from grade should be 8 inches in Seattle, not the 6 inches that is acceptable in drier climates. Splash-back from hard surfaces and persistent ground moisture make this extra clearance important.
All end grains must be sealed on wood and fiber cement siding. Cut ends act like straws, wicking moisture deep into the material. Two coats of primer on all cut ends block this pathway.
Rainscreen or drainage plane is essential, not optional. The persistent moisture in Seattle’s air means that even small amounts of water trapped behind siding do not dry out between rain events.
Flashing must be continuous and properly lapped at all transitions. Coastal winds drive rain horizontally, and gaps that would not be problems in other climates become failures in Seattle.
Professional Installation Matters
While material quality is important, installation quality determines long-term performance. A professional installer familiar with Pacific Northwest moisture management practices understands the details that prevent failures: proper flashing sequences, drainage plane installation, expansion gap requirements, and fastening techniques.
Professional installers also recognize when hidden damage requires repair before siding installation proceeds. They catch problems during the tear-off phase that DIY installers often miss or ignore, preventing costly callbacks and premature failures.
For Seattle-area homeowners planning siding installation or re-siding projects, contact our team at (425) 517-1751 for a consultation. We provide detailed estimates, explain critical installation details, and ensure that your siding is installed to perform reliably in the Pacific Northwest climate.
Not sure how bad yours is?
Send a photo or describe the spot over the phone. We will tell you whether it is a patch, a section, or something structural before anyone comes out.
Mon–Fri, 7:00am – 5:00pm
Questions homeowners ask us about this
What is the most common siding installation mistake in Seattle?
How tight should siding fasteners be?
Why does properly installed siding still fail in Seattle?
Do I need a building permit for siding installation in Seattle?
Read next
- Installation
How Fiber Cement Siding Handles Seattle's Rain
Fiber cement siding resists Seattle's moisture, lasting 30-50+ years. Learn proper installation, maintenance, and why it outperforms wood and vinyl in wet climates.
- Siding Repair
Best Siding for Seattle's Rainy Weather
Compare fiber cement, vinyl, wood, engineered wood, and metal siding for Seattle's wet climate—moisture resistance, maintenance, lifespan, and cost.
- Dry Rot
Preventing Water Intrusion in Seattle Homes: Essential Guide
Ignoring small leaks in Seattle invites expensive dry rot and mold. Seal trim, install moisture-resistant siding, and maintain gutters to prevent damage.
Get a straight answer on your siding, trim, or rot
Free estimate, no obligation, and usually a slot the same week. We cover Seattle, Bellevue, Redmond, Kirkland, Bothell, and Tacoma.
Mon–Fri, 7:00am – 5:00pm · Free estimates · Same-week scheduling