
7 Ways to Prevent Siding Moisture Problems in Seattle
Effective strategies to prevent moisture problems in siding, including installation tips, maintenance schedules, and material choices for Seattle homes.
By Seattle Trim Repair · Published · Updated
Moisture in your siding can lead to costly repairs, mold, and structural damage. In Seattle, where homes face 37 inches of annual rainfall and 155 rainy days per year, siding moisture problems are not a question of if but when unless you take proactive steps to prevent them. The good news is that most moisture problems are preventable with the right installation, materials, and maintenance habits.
Here are seven proven ways to protect your siding from moisture damage and extend its lifespan in Seattle’s challenging climate.
Get Professional Siding Installation
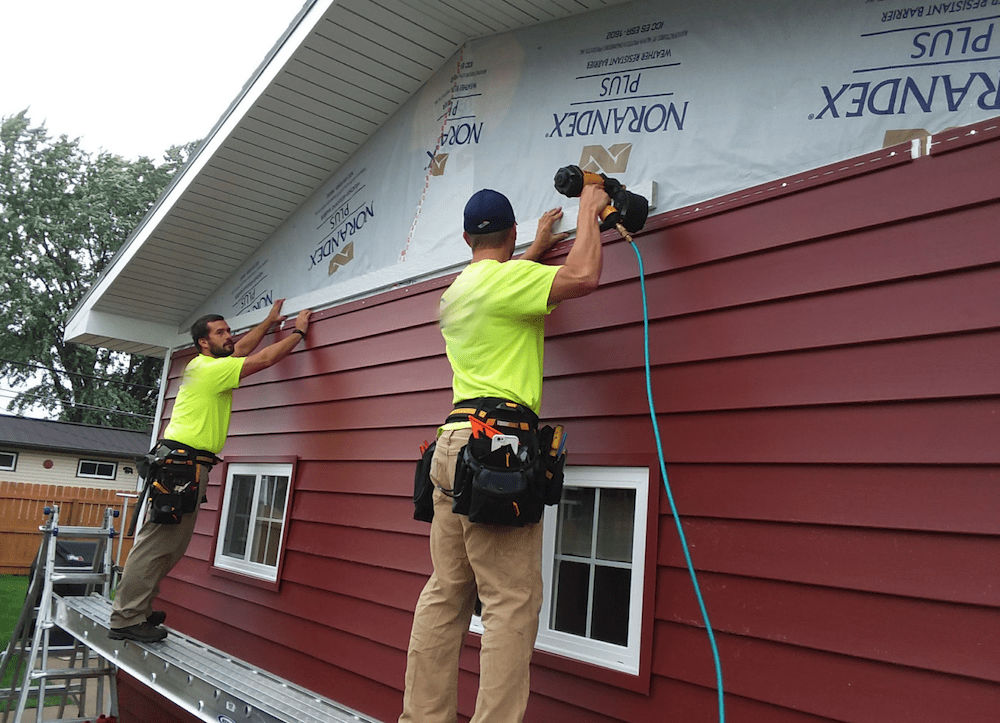
Having your siding installed by professionals is one of the best ways to protect your home from moisture damage. Even the highest-quality siding will not perform well if it is not installed correctly. Skilled installers ensure that every panel is sealed properly, overlaps are precise, and all components are aligned to resist moisture and channel water away from your home.
Particular care is needed around windows and doors since these areas are especially prone to water intrusion. Professional installers focus on creating a seamless moisture barrier in these spots, something that DIY efforts often fail to achieve. They understand how to install flashing that directs water away from vulnerable areas, how to create proper drainage gaps, and how to seal penetrations where pipes or wires pass through siding.
When siding is not installed properly, water can seep in unnoticed, leading to expensive structural damage over time. Common installation mistakes include omitting or improperly installing the water-resistive barrier, failing to create ventilation gaps behind the siding, using improper fasteners that corrode or allow moisture penetration, and neglecting kickout flashing at roof-to-wall intersections.
By choosing professional installation, you are not only protecting your home’s integrity but also avoiding costly repairs down the road. Professional installers also understand Seattle-specific challenges, like how to account for the region’s persistent moisture and which installation techniques work best in marine air conditions.
Expert siding installation services ensure your siding system works perfectly from day one. Whether it is James Hardie® fiber cement, Western Red Cedar, or LP SmartSide® engineered wood, proper installation according to manufacturer guidelines reduces the risk of moisture-related problems. Investing in professional installation is a smart way to safeguard your home and avoid unnecessary headaches.
Keep Gutters and Downspouts Clean
Your gutters and downspouts are your home’s first line of defense against water damage. When they are clogged, water can spill over and soak your siding, leading to issues like rot, mold, and structural problems.
When debris like leaves and twigs fill your gutters, water has nowhere to go but over the edges. This overflow can seep into small gaps in your siding, steadily weakening it and allowing moisture to creep deeper into your home’s structure. In Seattle’s climate, where gutters work overtime during the long rainy season, a clog can cause damage in just a few storms.
To avoid these problems, make gutter cleaning a regular habit. Aim for at least twice a year: once in late spring after trees have finished dropping debris and again in early fall before the rainy season begins. If your home is surrounded by trees, you might need to clean them more often, potentially three to four times per year.
Start by removing larger debris by hand using gloves and a small scoop. Then use a garden hose to flush out smaller particles, working from the high end toward the downspout. This ensures water can flow freely when storms hit.
While you are cleaning, check the gutter joints and downspout connections. Look for signs of leaks, rust, or damaged caulking. These are common trouble spots that can allow water to escape and run down your siding. Fixing them early can save you from bigger headaches later.
Install downspout extensions to channel water at least three to four feet away from your foundation. Without these, water tends to pool near your home’s base, splashing back onto the lower sections of siding and causing ongoing moisture problems. In areas where water naturally flows toward the house, consider adding splash blocks or underground drainage to move water further away.
Make sure your gutters are properly sloped with about a quarter-inch decline for every ten feet of gutter. Misaligned or sagging gutters can trap water, leading to overflow and, ultimately, siding damage. Use a level to check the slope and adjust hangers as needed to maintain proper drainage.
Seal Gaps and Cracks Promptly
Even the smallest gaps in your siding can let water sneak in, leading to long-term damage. Tackling cracks and gaps as soon as you spot them is key to keeping your home in good shape.
Start by thoroughly inspecting your siding. Pay extra attention to areas around windows, doors, and trim. These spots are prone to wear and tear, especially when caulk begins to break down. Look for signs like caulk pulling away, visible cracks, or gaps where daylight peeks through.
For repairs, always use a high-quality, weatherproof caulk designed for exterior use. The type of caulk matters. For fiber cement siding, apply 100 percent acrylic latex primer or an approved caulk to cut ends and joints. For wood siding, use a flexible exterior-grade caulk that can handle wood movement. For vinyl siding, use a caulk specifically formulated to adhere to plastic surfaces.
When caulking fiber cement siding, focus only on the vertical trim around windows, doors, and corners. Avoid caulking areas like J-channels, F-channels, or butt joints. These are designed to allow movement and proper drainage. Sealing them can trap moisture and cause more problems than it solves.
Here is how to reseal effectively: Clean and dry the area thoroughly. Remove old caulk using a scraping tool or utility knife. Cut the tip of the caulk tube at a 45-degree angle for precise application. Apply the caulk evenly in one smooth pass, then smooth it out with a caulking tool or your finger for a clean finish.
Keep an eye out for warning signs that it is time to reseal, such as caulk pulling away from surfaces, visible cracks or holes in existing caulk, warped or buckled siding near joints, or loose panels with gaps. Addressing these issues quickly can prevent moisture from causing further damage.
General resealing schedules based on siding type: vinyl siding every five to ten years, fiber cement siding every two to three years, wood siding every three to five years, and composite siding every eight to ten years. However, inspect annually and reseal anytime you notice deterioration, regardless of the schedule.
Always consult your siding manufacturer’s installation guide for specific caulking instructions. This ensures proper moisture protection and keeps your warranty intact. Regular inspections will help you catch potential problems early and maintain your siding’s durability in Seattle’s wet climate.
Clean and Inspect Siding Regularly
Keeping your siding in good shape means committing to regular cleaning and yearly inspections, especially after harsh weather. This habit not only helps you spot moisture problems early but also extends the lifespan of your siding. Think of it as a way to catch small issues before they turn into big, expensive headaches.
Start by walking around your home and checking for signs like peeling paint, bubbling, flaking, or warping. These can all point to water sneaking in where it should not. Pay attention to dark stains, and give the siding a gentle press with your hand. A firm surface is a good sign, but if it feels soft, there could be hidden damage lurking underneath. Exposed wood that appears dark and feels damp is another red flag for moisture trouble.
Keep an eye out for mold or mildew. Black or green patches, especially in shaded or damp areas, are strong indicators of moisture problems. If you catch a musty smell outside, it might be a clue that mold is hiding somewhere, or there is another source of moisture nearby.
Do not stop at the siding. Inspect windows and trim, too. Soft or cracked windowsills and trim that feel spongy could mean water is finding its way in. Check the caulking around all joints, and look for areas where trim has pulled away from the wall.
When it is time to clean, the method depends on your siding material. For vinyl or fiber cement siding, use a garden hose and mild detergent with a soft brush. Work from top to bottom to avoid streaking. You can use a low-pressure power washer on these materials, but keep the pressure under 1,200 PSI and maintain an 18 to 24 inch distance.
For cedar or other wood siding, skip the pressure washer entirely. The force can damage wood fibers and drive water into the grain, causing more harm than good. Instead, use hand washing with oxygen bleach, which is gentler on wood and safer for nearby plants while still effectively removing mold and mildew.
Clean your siding annually, ideally in late spring after the wet season but before summer heat sets in. This removes organic buildup that can trap moisture against the siding during the next rainy season.
Take photos and jot down notes during your inspections. Keeping a record helps you track changes and spot patterns over time. Note the date, weather conditions, and any issues you find. This documentation is valuable if you need to file an insurance claim or discuss problems with a contractor.
If you find extensive damage, multiple areas of rot, or structural concerns, do not attempt repairs yourself. These are signs that moisture has penetrated deeply, and professional assessment is needed to determine the full extent of the problem and the proper solution.
Choose Water-Resistant Siding Materials
Opting for water-resistant siding is a smart way to protect your home from moisture damage while keeping repair costs in check. In Seattle’s climate, your choice of siding material makes a significant difference in how well your home withstands 37 inches of annual rainfall.
James Hardie® fiber cement siding is built to last and stands up exceptionally well to Seattle weather. Made from a blend of cement, sand, and cellulose fibers, fiber cement creates a dense structure that resists rot, warping, and cracking caused by temperature shifts. It does not absorb water like wood, so it will not swell or decay. If you are considering a full-home siding replacement with fiber cement, expect costs to range between $13,325 and $37,500, depending on the size of your home and any underlying repairs needed. While this is a significant investment, fiber cement can last 30 to 50 years with minimal maintenance.
Western Red Cedar is a natural choice for moisture resistance due to the oils present in the wood. Cedar stands out for its ability to withstand rot and decay better than most wood species. To keep cedar siding in top shape, plan on staining or sealing it every three to five years. The natural beauty of cedar appeals to many homeowners, but it does require more maintenance commitment than synthetic alternatives. Full cedar siding replacement typically costs $15,000 to $25,000.
LP SmartSide® engineered wood combines the classic appearance of natural wood with improved durability. Treated with resins and special coatings during manufacturing, it provides a strong moisture barrier while maintaining a traditional aesthetic. Engineered wood performs better than natural wood in wet climates but still requires periodic maintenance. It offers a good middle ground between the low maintenance of fiber cement and the natural beauty of cedar, with costs typically ranging from $12,000 to $22,000 for full replacement.
The right siding material depends on your local climate, maintenance preferences, and budget. In Seattle’s wet environment, fiber cement offers the best long-term value with its exceptional moisture resistance and minimal maintenance needs. Cedar provides timeless beauty for those willing to invest in regular upkeep. Engineered wood strikes a balance between aesthetics and performance for homeowners who want the look of wood with better moisture resistance.
Trim Plants and Tree Branches
Keeping nearby vegetation under control is just as important as proper installation and regular cleaning when it comes to protecting your siding. Overgrown plants and tree branches can trap moisture, limit airflow, and create the perfect environment for mold, rot, and decay.
When plants grow too close to your siding, they hold moisture against your home’s exterior long after the rain has stopped. This lingering dampness encourages the growth of mold, mildew, and algae, which can speed up the deterioration of your siding. Dense vegetation can also create a shaded, humid environment around your home. Without proper airflow, the siding stays damp and vulnerable to damage.
Tree branches brushing against your siding during windy weather can scrape away protective layers, leaving your home exposed to water penetration. Even gentle contact over time can wear through paint and finish, creating entry points for moisture.
To protect your siding, aim for a 12-inch gap between plants and your home’s exterior. This space allows air to flow freely, helping the siding dry faster after it gets wet. Pair this with regular inspections and sealing to keep moisture at bay. Trim shrubs and bushes regularly to ensure they do not grow back against your home.
For trees, maintain a ten to twenty feet clearance from your siding. This not only prevents branches from coming into contact with your home but also minimizes the accumulation of leaves and debris around your foundation. Different types of vegetation require different pruning routines. Deciduous trees typically need trimming every three to five years, while evergreen trees can go five to seven years between major cuts. Ornamental trees and shrubs, however, should be pruned annually to keep them from encroaching on your siding.
When planting new landscaping, position mature plants at least ten feet away from your home to prevent future issues. Choose plants that stay compact and do not require frequent aggressive pruning. Avoid vining plants that climb walls, as they trap moisture and create pathways for water to reach your siding.
Keeping vegetation trimmed not only helps prevent moisture problems but also makes siding inspections much easier. With fewer plants blocking your view, you can quickly spot issues like cracks, loose boards, or early signs of water damage before they escalate into costly repairs. Proper clearance also discourages pests from nesting near your home, reducing the risk of infestations.
Add Proper Ventilation Behind Siding
Good ventilation behind your siding is essential to keep moisture at bay and avoid issues like mold, wood rot, or structural damage. The idea is simple: allow cool air to flow in at the bottom and warm air to rise and escape at the top, creating a natural cycle that continuously removes moisture.
Each siding material has its own ventilation needs. Vinyl and fiber cement siding systems often use starter strips and soffit vents to promote airflow. Wood siding works best with furring strips or ventilated rain screens that maintain a three-quarter to one-inch air gap behind the panels. Engineered wood and composite siding benefit from similar methods using furring strips to ensure proper airflow.
The goal is always the same: create enough space for air to circulate and moisture to escape. Without this gap, water that penetrates the siding or condenses on the back of panels has nowhere to go. It remains trapped against the water-resistive barrier and sheathing, leading to rot and mold growth.
To maximize airflow during installation, place intake vents every 16 to 24 inches along the foundation level. Maintain a three-quarter to one-inch gap behind the siding panels for consistent ventilation. At the top, install exhaust vents either in the soffit or near the roofline to let warm, damp air escape.
The house wrap or water-resistive barrier should remain intact and uncompressed during installation. This layer helps water vapor pass through while keeping liquid water out. Compressing it against the sheathing eliminates the drainage and drying capacity that proper ventilation provides.
If you are dealing with existing siding, retrofitting vents at the base and top can improve ventilation, though this kind of project often requires a professional touch to get it right. Improper retrofitting can create more problems than it solves if drainage paths are blocked or vents are placed incorrectly.
Certain warning signs suggest your siding might not be ventilating properly. Look for moisture stains or peeling paint on siding surfaces, musty odors around the exterior of your home, or siding that feels noticeably hotter than the surrounding air on sunny days. Well-ventilated siding should only feel slightly warmer than ambient temperature, as the air gap allows heat to escape rather than build up.
Addressing ventilation issues promptly can prevent bigger problems down the road. Proper ventilation is not just a technical detail. It is a critical step in protecting your home from Seattle’s persistent moisture and extending the life of your siding investment.
Protecting your home’s exterior requires a thoughtful blend of choosing the right materials, ensuring proper installation, and staying on top of maintenance. These three elements work together to keep your siding in great shape and safeguard your home from moisture damage in Seattle’s demanding climate.
Selecting durable materials like fiber cement or cedar can significantly extend the life of your siding while balancing upkeep costs. However, even the best materials can fail without expert installation. Skilled professionals know how to apply house wrap and place flashing strategically to create a strong barrier against moisture intrusion.
Regular maintenance tasks like caulking, cleaning gutters, and scheduling inspections are just as vital. These small efforts help catch problems early, preventing minor issues from becoming major headaches. Minor repairs starting at $120 can prevent extensive damage that might cost $4,500 to $12,000 or more to fix.
For expert siding installation or moisture damage repair in Seattle, visit /siding-repair/ or call (425) 517-1751.
Not sure how bad yours is?
Send a photo or describe the spot over the phone. We will tell you whether it is a patch, a section, or something structural before anyone comes out.
Mon–Fri, 7:00am – 5:00pm
Questions homeowners ask us about this
What are the early signs of moisture problems in my siding?
Why should I hire professionals for siding installation?
What type of siding works best in Seattle's wet climate?
How often should I clean and inspect my siding in Seattle?
Read next
- Siding Repair
How Seattle Weather Impacts Siding Durability
Seattle's rainy, windy climate accelerates siding deterioration. Learn which materials last longest and how proper installation prevents costly damage.
- Dry Rot
Dry Rot Prevention: 5 Ways to Stop Moisture Intrusion
Learn effective prevention strategies for dry rot caused by moisture intrusion. Professional inspections, maintenance schedules, and material choices.
- Siding Repair
Seasonal Siding Maintenance Guide for Seattle Homes
Essential seasonal siding maintenance tips for Seattle homes to prevent moisture damage and extend siding life in our rainy climate.
Get a straight answer on your siding, trim, or rot
Free estimate, no obligation, and usually a slot the same week. We cover Seattle, Bellevue, Redmond, Kirkland, Bothell, and Tacoma.
Mon–Fri, 7:00am – 5:00pm · Free estimates · Same-week scheduling