
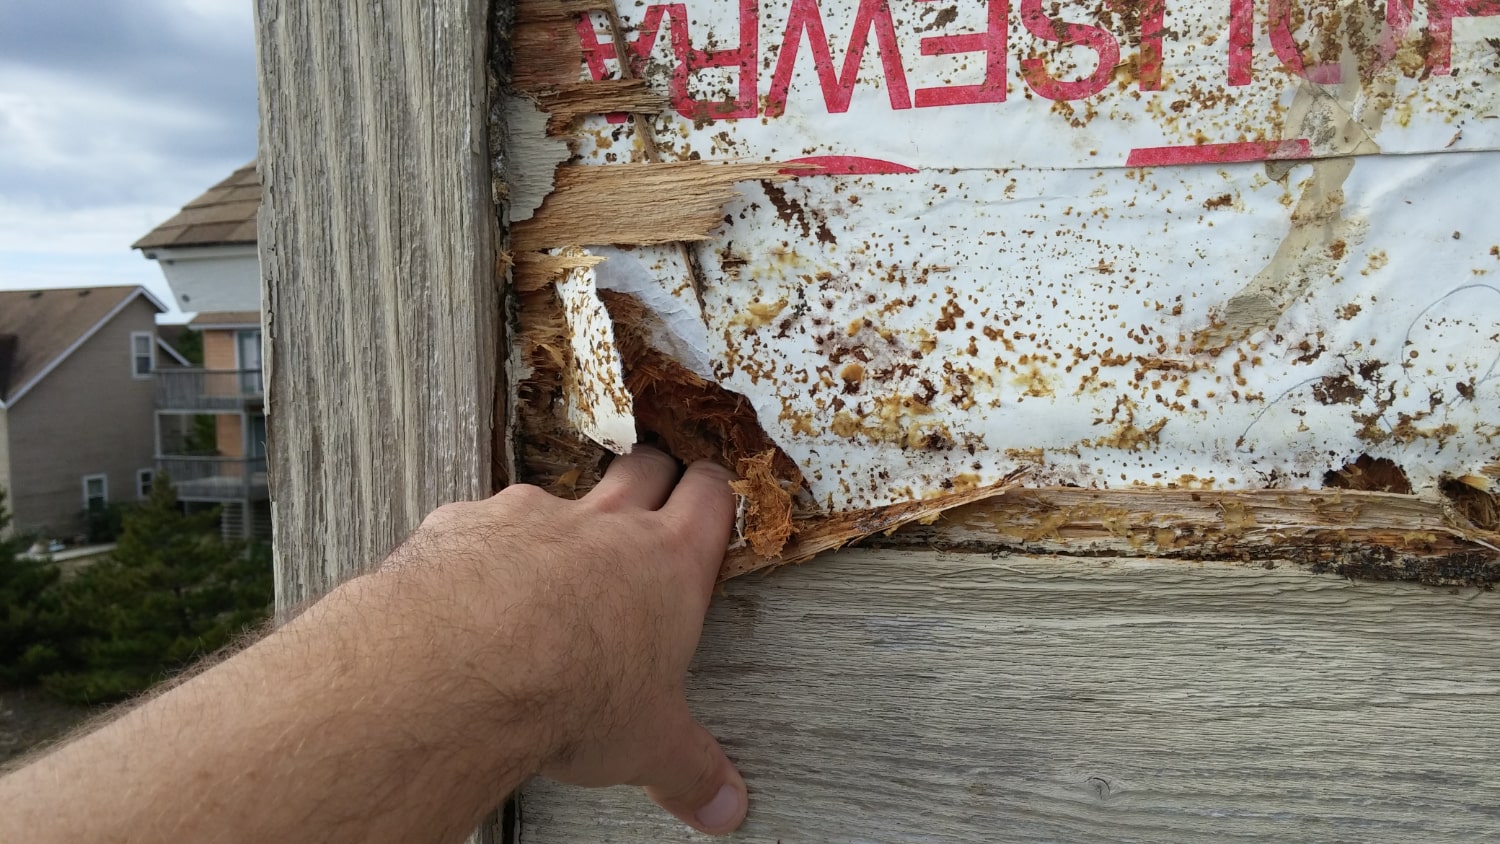
5 Moisture Control Tips to Prevent Dry Rot
Five proven moisture-control steps to prevent dry rot: improve ventilation, fix leaks promptly, clean gutters, seal exposed wood, and schedule inspections.
By Seattle Trim Repair · Published · Updated
Dry rot, caused by the fungus Serpula lacrymans, thrives when wood moisture exceeds 20 percent. Seattle’s climate – with 155 rainy days per year, persistent humidity, and mild temperatures – creates ideal conditions for this destructive decay. Preventing dry rot is entirely about controlling moisture levels before the fungus can take hold.
The financial stakes are high. Dry rot causes $17 billion in damage annually across the United States, destroying 20 billion board feet of timber every year. In Seattle, repair costs range from $1,000 for minor surface fixes to over $100,000 for extensive structural restoration. Most home insurance policies do not cover dry rot because it is considered preventable maintenance.
The good news: dry rot is entirely preventable through consistent moisture control. These five proven steps protect your home from fungal decay.
1. Improve Ventilation in Moisture-Prone Areas
Proper airflow is the foundation of dry rot prevention. The U.S. Department of Energy reports that air movement accounts for over 98 percent of water vapor movement in building cavities. By ensuring air circulates through spaces like attics, crawl spaces, and basements, moisture is carried away before it can settle in wood and foster fungal growth.
Serpula lacrymans, the fungus responsible for dry rot, thrives when wood moisture levels exceed 28 to 30 percent and requires at least 20 percent to survive. Ventilation helps keep wood below these levels by expelling humid air.
How to Implement Effective Ventilation
For ventilation to work effectively, a balanced system of intake and exhaust is essential. In attics, aim to have half of your vent area at the roof peak (ridge vents) and the other half at the soffits or eaves. This setup naturally draws in cool air while pushing out warm, moisture-laden air. The recommended total net free ventilating area is 1/150 of the attic floor area, or 1/300 if a vapor retarder is used.
In crawl spaces, vents should be installed near each corner, within 8 inches of the foundation’s top, to ensure proper cross-ventilation. Pair this with a 6-mil polyethylene vapor barrier on dirt floors to stop ground moisture from seeping into the wood above.
For moisture-heavy areas like bathrooms and kitchens, exhaust fans that vent directly outside are essential. Inside your home, simple adjustments like opening interior doors and moving furniture away from exterior walls can improve airflow and reduce condensation on cold surfaces.
Vent systems should be inspected 2 to 4 times a year to ensure they are clear of insulation, debris, or nests. Mechanical systems like turbines or powered fans need more frequent checks due to their moving parts.
2. Fix Leaks Quickly in Pipes, Roofs, and Fixtures
Water leaks are a direct gateway to dry rot. When left unresolved, leaks create the perfect environment for fungal growth. All it takes is wood moisture exceeding 20 percent for trouble to begin.
Once the water source is eliminated, the conditions that allow fungal growth disappear. Without moisture, the dry rot fungus cannot survive or spread. Even seemingly minor issues like a slow drip under a sink or a small roof leak can weaken wood significantly in as little as one month.
Simple Steps to Get Started
Start with basic fixes: re-caulk windows, reseal door frames, and inspect plumbing under sinks. Use a screwdriver to test wood – if it crumbles or the tool easily penetrates, moisture has already caused damage.
For more complex problems like roof leaks or hidden plumbing issues, bring in a professional. Key areas to inspect include rim joists, floors around tubs and toilets, where decks attach to the house, and all wall and roof flashing.
Staying on Top of Maintenance
Inspect for leaks every three months. Watch for water stains on ceilings, peeling paint, musty smells, or wood that looks darker than usual or shows cracking. A persistent musty odor in basements, attics, or crawl spaces is often a red flag, even before visible damage appears.
Repairing leaks early is far cheaper than dealing with the aftermath of dry rot. Fixing window trim might cost under $400, while repairing structural damage caused by neglect could run over $40,000.
3. Keep Gutters, Downspouts, and Drainage Systems Clean
Gutters play a crucial role in directing water away from wood, reducing the chances of moisture buildup that can lead to dry rot. When properly maintained, gutters divert thousands of gallons of water away from areas like fascia boards, soffits, and siding.
However, when clogged, they overflow and expose these surfaces to excessive moisture, creating the perfect environment for fungal growth. Just a few inches of rainfall can result in thousands of gallons of runoff. If gutters are not functioning properly, water can pool near your foundation, saturating the surrounding soil.
Over time, this moisture can seep into your home’s interior, pushing wooden structures past the 20 percent moisture level where dry rot fungus thrives. Clogged gutters also create standing water that attracts pests and promotes mold growth.
How to Maintain Gutters Effectively
Cleaning gutters is straightforward. Use a gutter scoop to remove debris and flush the system with a hose. Make sure downspouts extend at least 5 feet from your foundation, or 10 feet if using underground pipes. To reduce debris buildup, consider installing leaf guards or strainers.
For optimal drainage, gutters should slope slightly toward downspouts at about 1/16 inch per foot. Downspouts should be spaced every 20 to 50 feet for maximum efficiency. Additionally, ensure that your landscaping slopes away from your home at a 5 percent grade – a 3-inch drop over 5 feet – to channel water away from the foundation.
Hiring a professional to clean gutters in the Seattle area typically costs between $150 and $250 per visit. For most homes, gutters should be cleaned at least twice a year – once in spring and once in fall. If your property is surrounded by tall trees or evergreens, you may need to clean them every three months due to increased debris.
4. Seal Grout, Caulk, Cracks, and Exposed Wood
Keeping moisture out starts with sealing gaps and cracks around your home. By addressing exterior gaps near windows, doors, and exposed wood, you cut off moisture’s primary entry points.
Sealing plays a key role in tackling two common moisture issues: air infiltration and capillary action. Capillary action occurs when porous materials like wood, masonry, and concrete pull moisture into cracks and pores, even moving water upward against gravity. A tiny crack in window or door flashing can lead to significant moisture problems.
Applying water-repellent preservatives and sealants to exposed wood creates a protective layer, keeping moisture levels low enough to stop fungal growth.
Implementation Steps
Most homeowners can handle basic sealing tasks. Re-caulk windows, door frames, and gaps where wood meets masonry using silicone-based sealants, which are more effective than petroleum-based options. For exposed wood, apply water-repellent preservatives or damp-proofing paint.
Small gaps or holes can be patched with epoxy wood filler. For added protection, treat new or exposed timber with borate preservatives like Bora-care or Tim-bor Professional for long-term defense against fungi.
Cost and Frequency
Sealing materials are budget-friendly compared to the cost of repairs. Basic caulking tubes cost just a few dollars, while borate treatments range from $19 to $91. Minor sealing repairs typically cost $120 to $400, while moderate damage requiring epoxy fillers and sealants can run $1,500 to $2,800.
If rot sets in, structural repairs can skyrocket to $4,500 to $12,000. Preventive sealing is a cost-effective way to avoid these expenses.
Plan to inspect sealants 2 to 4 times a year, especially before and after the rainy season. Watch for signs like peeling or bubbling paint, which could indicate trapped moisture. Reseal or repaint exposed wood every 2 to 3 years to maintain protection.
5. Schedule Regular Inspections and Use Moisture-Resistant Materials
Regular inspections are key to catching early signs of dry rot. Look for musty odors, peeling paint, discoloration, or soft wood, as these often signal hidden issues. Inspections can reveal moisture sources in crawl spaces, attics, or behind drywall where leaks or condensation might quietly build up.
A simple screwdriver test during these checks can help: if the wood feels soft, spongy, or brittle, it is a clear sign of active rot. Keeping an eye on these areas ensures wood moisture stays below the critical 20 percent mark.
Pairing Inspections with Moisture-Resistant Materials
Pressure-treated lumber for decks and posts, borate preservatives for framing, and 6-mil polyethylene vapor barriers in crawl spaces are excellent options. These materials act as barriers, cutting off moisture at key entry points.
Investing in prevention now saves you from hefty repair bills later. Professional inspections, often free initially, can catch problems early and save thousands in potential repairs. Addressing issues early might mean replacing a single board instead of dealing with extensive structural damage, which can cost anywhere from $4,500 to $12,000.
Using moisture-resistant materials like borate preservatives or pressure-treated lumber adds only a small expense compared to the cost of major repairs down the line.
Inspection Schedule
Plan to inspect your home at least twice a year and schedule professional assessments annually. Seasonal checks should focus on crawl spaces (look for musty odors or sagging floors), exterior trim (watch for peeling paint or warping), and roofs (check for water stains on fascia boards).
If you have installed a crawl space encapsulation system with dehumidification, it can last over 25 years with very little maintenance required.
Controlling moisture is the key to protecting your home from dry rot. Simple steps like improving airflow, sealing gaps, fixing leaks promptly, maintaining gutters, and scheduling regular inspections make a measurable difference.
In Seattle’s wet climate, these preventive measures are not optional – they are essential. Acting early can mean the difference between a minor $1,000 repair and a $100,000 structural overhaul.
If you are concerned about moisture levels in your home or want a professional assessment, schedule a free dry rot inspection to identify hidden risks before they become expensive emergencies.
Not sure how bad yours is?
Send a photo or describe the spot over the phone. We will tell you whether it is a patch, a section, or something structural before anyone comes out.
Mon–Fri, 7:00am – 5:00pm
Questions homeowners ask us about this
What are the common signs of dry rot in a home?
How often should I have my home inspected for dry rot?
What materials are best for preventing dry rot in new construction?
Does home insurance cover dry rot repairs?
Read next
- Dry Rot
Dry Rot Identification Guide for Seattle Homeowners
Learn to spot dry rot signs early: cracked timber, musty odors, soft wood. Seattle-specific identification tips and what to do when you find it.
- Dry Rot
What Causes Dry Rot in Pacific Northwest Homes?
Understand what causes dry rot in Seattle homes, from persistent rain to poor ventilation, and how to prevent structural damage with proven strategies.
- Dry Rot
How Ventilation Prevents Dry Rot in Seattle Homes
Proper attic, crawl space, and exterior siding ventilation keeps wood moisture below 20% and stops dry rot fungus in Seattle's damp climate.
Get a straight answer on your siding, trim, or rot
Free estimate, no obligation, and usually a slot the same week. We cover Seattle, Bellevue, Redmond, Kirkland, Bothell, and Tacoma.
Mon–Fri, 7:00am – 5:00pm · Free estimates · Same-week scheduling