
How to Stop Wood Rot: A Seattle Homeowner's Guide
Learn how to identify, treat, and prevent wood rot in Seattle's wet climate. Understand when DIY works and when to call a dry rot specialist.
By Seattle Trim Repair · Published · Updated
Finding soft, crumbly wood on your home’s exterior signals a problem that won’t fix itself. Wood rot, caused by moisture-loving fungi, threatens structural integrity if left unchecked. Seattle’s 150+ annual rainy days create ideal conditions for these organisms to thrive, making understanding prevention and treatment critical for Pacific Northwest homeowners.
The key to handling wood rot is early detection and addressing the root cause. Surface treatments and DIY patches fail unless you eliminate the moisture feeding the fungi. This guide helps you identify rot accurately, understand when professional help is necessary, and prevent future occurrences.
The Root Cause: Moisture
Wood rot is not a natural aging process. It’s active decay caused by fungi that consume the cellulose and lignin that give wood its strength. These fungi have one absolute requirement: water. Wood with moisture content below 20% will never rot, regardless of age. Every case of wood rot traces back to a moisture problem.
Common moisture sources in Seattle homes include clogged gutters overflowing onto fascia and siding, failed caulking around windows and doors allowing water infiltration, leaking roofs or improperly installed flashing directing water into wall cavities, poor ventilation in crawlspaces and attics causing condensation, and siding installed too close to damp soil or sprinkler spray zones.
Seattle’s climate compounds these issues. The Pacific Northwest’s prolonged wet seasons keep wood moisture content elevated for months. Marine air maintains high humidity even between rain events. Shaded north walls and areas under dense evergreens stay damp year-round, creating perfect conditions for fungal growth.
Understanding that moisture causes rot shifts your focus to the right solutions. Treating visible rot without fixing the water source guarantees recurrence. Finding and eliminating moisture intrusion must be step one of any rot treatment.
Identifying True Rot vs. Surface Issues
Not every dark spot or discoloration on wood indicates rot. Learning to distinguish between cosmetic surface issues and actual structural decay prevents unnecessary panic and helps you respond appropriately.
Start with the simplest test. Try cleaning the discolored area with a damp cloth. If it wipes away, you’re seeing dirt or algae—not rot. These surface contaminants indicate moisture exposure but haven’t damaged the wood itself yet.
Black or green spots that remain after cleaning likely represent mildew. Mildew is a surface fungus that grows on paint or wood exteriors in damp conditions. While it signals a moisture problem, mildew doesn’t compromise wood structure. Clean it with mildew remover and identify why that area stays damp.
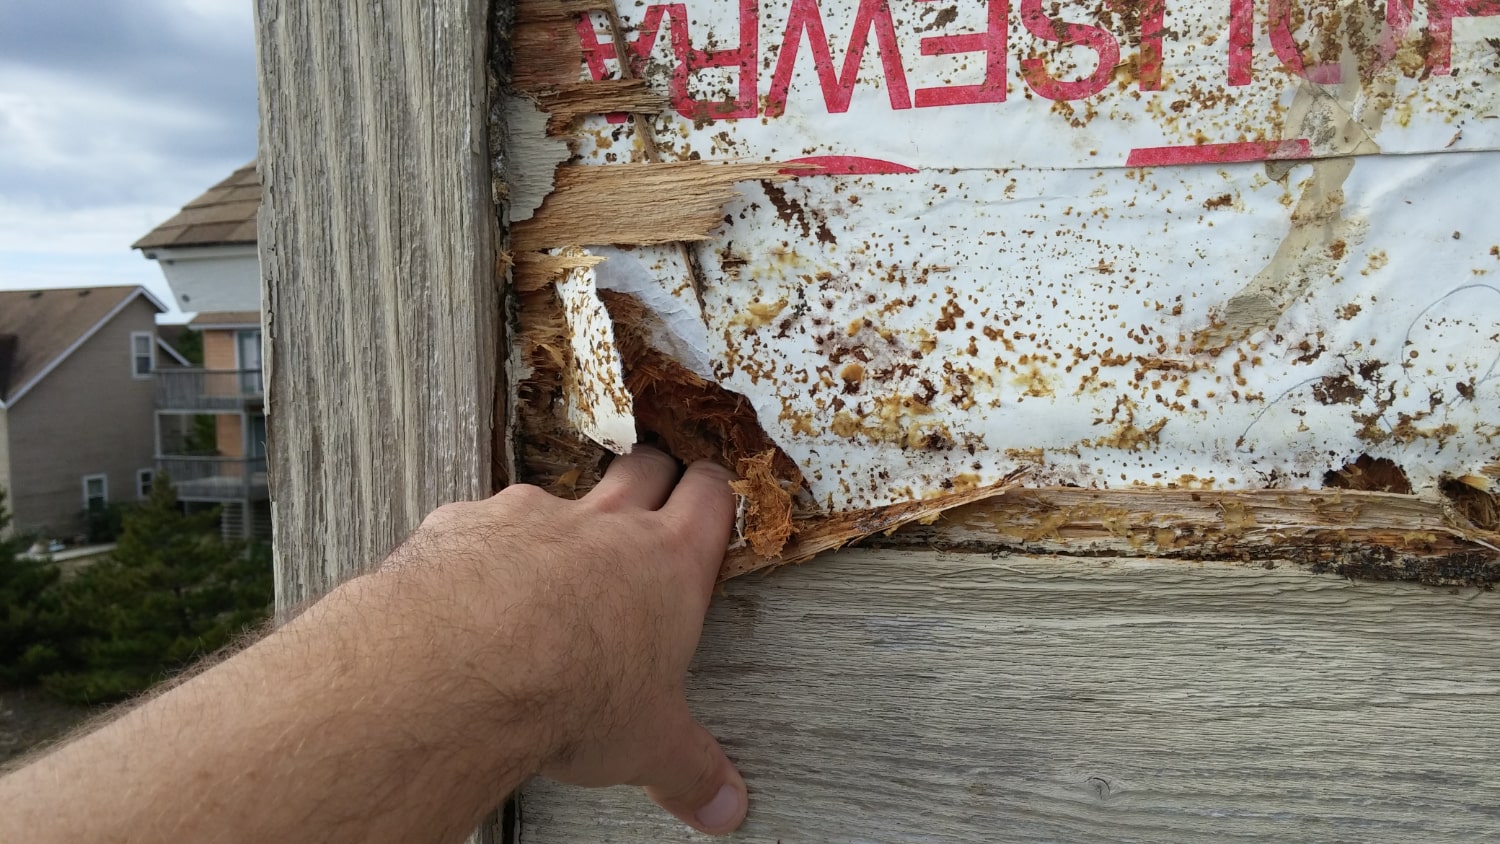
The screwdriver test reveals true rot. Press a screwdriver tip firmly into suspect wood. Healthy wood resists pressure, feeling hard and solid. Rotted wood yields easily, feeling soft, spongy, or punky. In advanced cases, the screwdriver sinks in with minimal pressure. Wood that crumbles when pressed has lost structural integrity.
Visual indicators of advanced dry rot include deep cube-shaped cracks in the wood surface, white cotton-like mycelium (the fungus body) visible in cracks or on wood, reddish-orange spore dust on or near affected areas, and wood that feels noticeably lighter than it should. These signs indicate active fungal growth requiring immediate professional attention.
The location and pattern matter. Isolated soft spots on window sills or door frames often indicate localized rot from a specific leak. Multiple areas showing damage simultaneously suggest a systemic moisture problem affecting larger sections of your home.
Understanding wet rot versus dry rot helps gauge urgency. Wet rot (Coniophora puteana) requires constant water contact and only affects water-saturated wood. It makes wood soft and dark but stays localized to the moisture source. Dry rot (Serpula lacrymans) is far more aggressive. Once established, it can generate moisture internally and spread through walls seeking new wood to consume—even traveling across masonry and non-food materials to reach distant timber.
When DIY Can Work (And When It Can’t)
Some very minor rot damage accepts DIY treatment. Understanding the strict limits of DIY repair prevents dangerous mistakes that compromise your home’s structure.
DIY epoxy filler treatment works only when all these conditions are met: damage is cosmetic only (smaller than a quarter), the wood is non-structural decorative trim only, you’ve completely fixed the moisture source causing the rot, and you’ve removed all deteriorated wood back to solid, healthy material.
The DIY process for qualifying situations involves first eliminating the moisture source—fix the leak, improve drainage, or correct whatever allowed water contact. Use a screwdriver or chisel to remove all soft, rotted wood until you reach only firm, solid material. Treat the remaining wood with a borate-based wood preservative to kill any remaining fungal spores. Apply wood hardener to stabilize the remaining solid wood. Fill the void with epoxy wood filler, following manufacturer instructions. After curing, sand smooth, prime, and paint to match.
This approach handles purely cosmetic damage on non-critical elements. It might suffice for a small soft spot on a decorative frieze board where appearance matters but structural load does not.
Why DIY Fails for Real Rot
DIY epoxy treatments fail for significant wood rot because of fundamental limitations. Epoxy filler provides no structural strength. It fills voids cosmetically but doesn’t restore the wood’s load-bearing capacity. Using filler on a rotted deck post, window sill, or fascia board masks dangerous structural weakness.
Incomplete removal guarantees failure. If any soft, infected wood remains under the filler, fungal spores continue living. Given moisture (which caused the original problem), they resume growing around and under the epoxy patch. The rot spreads invisibly, hidden by the surface patch, until failure occurs.
Moisture persistence defeats patches. If you haven’t truly eliminated the water source, moisture continues feeding fungi. The problem recurs within months to years, often worse than before because the cosmetic patch delayed proper treatment.
Professional dry rot repair involves surgical removal of all decayed wood, cutting back 12-18 inches beyond visible damage to ensure complete elimination of infected material. Treatment of surrounding wood with fungicides and preservatives to kill remaining spores. Repair or replacement of the moisture source that caused the rot—flashing, gutters, grading, or ventilation. Installation of replacement wood or moisture-resistant materials like fiber cement or PVC trim. Proper sealing, priming, and finishing to protect against future moisture.
This comprehensive approach addresses both the visible damage and its underlying cause. It restores structural integrity and prevents recurrence—outcomes surface patches cannot achieve.
Structural Components Require Professional Treatment
Certain parts of your home never accept DIY rot treatment because failure risks collapse, injury, or catastrophic damage. Structural elements requiring professional intervention include floor joists and beams supporting floors, deck posts and ledger boards bearing weight, roof rafters and trusses holding up your roof, wall studs in load-bearing walls, fascia boards if they support gutters or soffit systems, and any wood element that could cause injury or major damage if it failed.
DIY patches on these components create hidden hazards. A rotted deck post filled with epoxy looks fine but can’t support the deck load. When it fails, the deck collapses without warning. A patched floor joist gradually weakens until someone steps on the supported floor and crashes through.
Professional contractors assess the full extent of damage, often discovering rot has spread beyond what’s visible. They understand load requirements and structural implications. They have access to proper materials, tools, and techniques for structural repairs. Their work includes warranties and meets code requirements for structural integrity.
The cost difference between professional structural repair and replacing your deck (or worse, dealing with injury from a collapse) makes professional treatment the only prudent choice for load-bearing components.
Prevention: The Real Solution
Preventing wood rot costs far less than treating it and eliminates the structural risks entirely. In Seattle’s wet climate, prevention requires consistent attention to moisture management.
Critical prevention tasks include cleaning gutters at least twice yearly, more often with nearby trees, to prevent overflow onto trim and fascia. Inspect and maintain caulking around all windows, doors, and penetrations every 2-3 years. Failed caulking funnels enormous amounts of water into wall cavities. Ensure crawlspace and attic ventilation prevents condensation and humidity buildup. Moisture meters showing readings above 20% indicate rot risk.
Keep siding at least 6 inches above soil grade and 2 inches above hardscaping. Soil contact wicks moisture into wood constantly. Trim vegetation 12-18 inches from walls to promote airflow and drying. Dense shrubs trap moisture and create rot-prone microclimates. Adjust sprinklers to avoid spraying siding or trim directly. Daily watering cycles keep wood perpetually wet.
Maintain paint and sealers on all exterior wood. Paint acts as a moisture barrier; once it fails, wood begins absorbing water immediately. In Seattle’s climate, exterior paint lasts 5-7 years before needing renewal. Schedule annual inspections of rot-prone areas: window sills and frames, door thresholds and casings, fascia boards and soffits, deck boards and railings, and corner boards and trim joints. Early detection when rot is tiny and localized costs hundreds to fix. Delayed discovery when rot has spread to framing costs thousands.
Consider upgrading to rot-resistant materials during any repair or renovation. PVC trim never rots. Fiber cement resists moisture and rot while accepting paint finishes. Composite materials outlast wood in wet climates. While these cost more upfront, they eliminate future rot repairs and maintenance cycles.
Professional prevention includes periodic dry rot inspections using moisture meters, probes, and thermal imaging to find elevated moisture levels before rot begins. These inspections cost $140-$800 but catch problems while they’re inexpensive to fix. For Seattle homeowners, the inspection investment prevents repairs that can reach $10,000-$20,000 when rot affects structural framing.
When to Call a Specialist
Certain situations demand professional dry rot assessment and treatment. Call a specialist when you find wood that feels soft, spongy, or crumbles when pressed; damage larger than your fist; rot on any structural component; multiple areas showing rot simultaneously; visible mycelium (white cottony growth) or mushroom-like fungal formations; musty odors near exterior walls suggesting hidden rot; or stained or deteriorating drywall inside, indicating rot spreading from exterior walls.
Seattle’s wet climate makes professional expertise particularly valuable. Local specialists understand the region’s specific challenges: which wood species and composite materials perform best in persistent moisture, proper rainscreen and drainage details for PNW conditions, identifying hidden rot patterns common in Seattle’s housing stock, and sourcing materials that match historic homes while offering superior rot resistance.
They bring diagnostic tools homeowners lack. Moisture meters measure wood moisture content accurately, identifying problem areas before visible rot appears. Thermal imaging reveals moisture patterns behind intact siding. Probes detect soft spots in wood concealed by paint.
Professional dry rot specialists guarantee their work, providing warranties that protect your investment. Their repairs meet building codes and pass inspection. They address both symptoms and causes, preventing recurrence.
For rot affecting structural components, professional treatment isn’t optional—it’s a safety requirement. The modest cost of proper repair prevents catastrophic failures and protects your home’s value and your family’s safety.
Understanding wood rot empowers Seattle homeowners to respond appropriately when they find it. Recognize that rot signals a moisture problem requiring correction. Distinguish between minor surface issues and true structural decay. Know when DIY might suffice and when professionals are necessary. Most importantly, invest in prevention through moisture management—it’s far cheaper and safer than dealing with rot after it develops.
Need expert dry rot assessment and repair for your Seattle home? Call us at (425) 517-1751 for a free 15-point inspection or visit our dry rot repair page to learn more about our services.
Not sure how bad yours is?
Send a photo or describe the spot over the phone. We will tell you whether it is a patch, a section, or something structural before anyone comes out.
Mon–Fri, 7:00am – 5:00pm
Questions homeowners ask us about this
What's the difference between dry rot and wet rot?
Can I fix wood rot myself with epoxy filler?
What's the single most important step to prevent wood rot?
Read next
- Dry Rot
5 Steps to Treat Dry Rot in Wood
Fix dry rot permanently with this proven five-step method: stop moisture, remove rotted wood, apply fungicide, harden with epoxy, then finish.
- Dry Rot
Dry Rot Identification Guide for Seattle Homeowners
Learn to spot dry rot signs early: cracked timber, musty odors, soft wood. Seattle-specific identification tips and what to do when you find it.
- Dry Rot
What is Dry Rot and Why It's a Problem in Seattle Homes
Learn what dry rot is and why Seattle homes are vulnerable. Spot it early, prevent costly damage—get expert guidance from Seattle dry rot specialists.
Get a straight answer on your siding, trim, or rot
Free estimate, no obligation, and usually a slot the same week. We cover Seattle, Bellevue, Redmond, Kirkland, Bothell, and Tacoma.
Mon–Fri, 7:00am – 5:00pm · Free estimates · Same-week scheduling