
Seattle Winter Prep: Protecting Wood from Dry Rot
Protect Seattle homes from winter dry rot. Maintain gutters, check grading, seal wood, improve ventilation. Save thousands in rot repair with fall prep.
By Seattle Trim Repair · Published · Updated
Seattle’s winter rain pushes exterior wood moisture above the 20% threshold where dry rot fungi thrive, threatening expensive structural damage. Fall preparation through gutter maintenance, proper grading, wood sealing, ventilation improvements, and regular inspections prevents rot that can cost $10,000-$20,000 to repair.
The Pacific Northwest’s wet winters create ideal conditions for wood decay. From October through April, persistent rain, high humidity, and limited drying time keep wood saturated for months. Seattle’s freeze-thaw cycles compound damage by widening cracks that allow deeper moisture penetration. Protecting your home before winter begins prevents the moisture accumulation that feeds destructive fungi.
Gutter and Downspout Maintenance
Gutters represent your home’s primary defense against water damage. When they fail, water cascades directly onto the most vulnerable exterior wood—fascia, soffits, and trim—exactly where dry rot commonly begins.
Clear gutters of all debris every 2-3 weeks during fall. Leaves, pine needles, and organic material accumulate rapidly in Seattle’s tree-dense neighborhoods. Blocked gutters overflow during rain, pouring water into soffits and behind siding. This creates the perfect environment for rapid rot development.
After removing debris, test drainage by running water through gutters with a garden hose. Watch for proper flow through downspouts. Look for pooling water that indicates sag or improper slope. Gutters must pitch slightly toward downspouts to drain completely.
Inspect for leaks and damage while cleaning. Look for dark water stains on fascia boards—telltale signs of leaks. Check for sagging sections or loose hangers that prevent proper drainage. Examine seams where gutter sections join for separation or deterioration.
Seal leaks immediately using silicone caulk. Clean and dry the area first for proper adhesion. Small leaks become major problems quickly when left unattended.
Extend downspouts to direct water 4-6 feet away from your foundation. Place splash blocks under downspouts to carry water at least 3 feet from the house. Add downspout extensions—PVC pipe works well and costs only $25-$50—to move water to safer locations away from your home.
After heavy fall storms, check extensions to confirm they’re still in place and not blocked by debris. Disconnected or clogged extensions dump water at the foundation, saturating soil that spreads moisture into crawlspaces and wall framing.
Consider professional gutter cleaning if you’re uncomfortable working at height or lack proper equipment. The service costs about $162 in Seattle—a small investment that prevents thousands in rot repair.
Landscape Grading and Vegetation Management
Your yard’s slope and plant placement significantly affect moisture levels around your home’s foundation and walls. Seattle receives over 150 rainy days annually, making proper drainage critical.
Check soil grading around your entire foundation. The ground should slope away from your home with a 6-inch drop over 10 feet—a 5% slope. This directs rainwater away rather than letting it pool against your foundation where it seeps into crawlspaces and saturates lower wall framing.
After heavy rain, walk your property looking for standing water near the foundation. Puddles indicate low spots or inadequate grading that need correction. Mark problem areas for repair.
Fill low spots with topsoil to restore proper slope. For small areas, this DIY project costs a few hundred dollars. Larger grading issues might require professional help at $500-$1,000 or more, but the investment prevents moisture problems worth thousands to repair.
For serious drainage problems, consider creating swales—shallow ditches that channel water away from your home. These work particularly well in Seattle’s clay soils that don’t absorb water readily.
Trim plants and shrubs 12-18 inches away from siding. Vegetation touching walls traps moisture, blocks airflow, and creates damp microclimates perfect for rot. Dense growth prevents walls from drying between rain events.
Cut tree branches back 6-10 feet from your roofline. Overhanging branches drop leaves that clog gutters and create shade that keeps walls damp. Branches touching roofs during wind cause physical damage and deposit moisture-retaining debris.
Pay special attention to north-facing walls and shaded areas under evergreens. These locations stay damp longest and suffer most from overgrown vegetation. Aggressive trimming in these vulnerable areas promotes air circulation and drying.
Adjust sprinkler heads so they don’t spray siding or wooden trim directly. Daily watering cycles keep wood saturated beyond what rain alone would cause. This unnecessary moisture exposure accelerates rot even in naturally resistant materials.
Exterior Wood Inspection and Assessment
Fall offers the last good opportunity before winter to inspect exterior wood thoroughly. Seattle’s wet season makes outdoor work difficult once persistent rain begins.
Conduct systematic inspection of all exterior wood, focusing on areas most vulnerable to rot. Start with window sills and door frames, especially bottom sections where water collects. Check fascia boards behind gutters where overflow causes damage. Examine siding corners and joints where water infiltrates. Inspect deck boards near planters or where water pools. Look at any wood contacting soil or close to grade.
Use the screwdriver test on suspect areas. Press a screwdriver tip firmly into wood. Healthy wood resists pressure. Soft, spongy wood that yields easily indicates rot has begun. Test multiple spots around the area—rot often extends beyond visible surface damage.
Watch for early warning signs that precede obvious rot: discoloration or darker areas in wood, peeling or bubbling paint indicating trapped moisture, visible cracks or splits in wood surfaces, unusual growths like mushrooms or white cotton-like mycelium, and musty or damp odors near exterior walls.
A moisture meter provides objective assessment. These tools cost $30-$100 and measure wood moisture content. Readings above 20% indicate rot risk even before visible damage appears. Readings above 25% suggest active decay is likely occurring or will soon begin.
Set up a regular inspection schedule. Photograph your exterior wood yearly from the same angles. Comparing images year over year reveals subtle changes in texture, color, or condition that indicate developing problems.
After heavy rainfall, check your attic for leaks that could lead to rot in roof framing. Look for water stains, damp insulation, or dripping. Early detection prevents minor leaks from becoming major structural damage.
Schedule professional dry rot inspection if you find any concerning signs. Seattle Trim Repair’s free 15-point inspection uses commercial moisture meters and professional expertise to identify problems homeowners miss. Early professional assessment catches small issues before they require expensive structural repairs.
Moisture Barriers and Protective Coatings
Seattle’s relentless rain demands comprehensive moisture protection for exterior wood. Proper barriers and coatings extend wood life from years to decades.
Apply sealants to exterior wood in late spring or early fall when weather is dry. Avoid sealing in late fall or winter—trapped moisture accelerates damage rather than preventing it. Wood needs to dry thoroughly before sealing.
Coat all sides of wood before assembly, including end grains. End grain absorbs moisture rapidly and needs extra protection. Back-priming—sealing all surfaces before installation—prevents moisture intrusion that occurs when only exposed surfaces are sealed.
Choose appropriate sealant types for Seattle’s climate. Paint and pigmented sealers provide the best protection, blocking both water and UV rays that degrade wood. Clear sealers protect against water but don’t block UV, which breaks down lignin in wood over time.
For high-moisture areas like crawlspaces, consider applying copper naphthenate or borate preservatives to untreated lumber. These liquid biocides penetrate wood and prevent fungal growth. They’re particularly valuable for floor joists and framing in damp crawlspaces.
Avoid petroleum-based sealants that trap water. Use food-grade silicone or silicone spray for sealing tight joints, cracks, and corners where other sealants won’t penetrate.
Resealing schedules depend on exposure. Decks in wet areas need resealing every 2-3 years. Siding paint and caulk last about 5 years before requiring renewal. Horizontal surfaces exposed to weather need more frequent attention than vertical protected areas.
Install vapor barriers in crawlspaces to block ground moisture from rising into floor joists and subflooring. Use reinforced polyethylene sheeting meeting ASTM E1745 Class A standards with perm rating below 0.1. For Seattle conditions, 15-20 mil thickness provides superior protection.
Lay vapor barrier across the entire crawlspace floor, overlapping seams by 12 inches and sealing them with waterproof tape. Extend the barrier 6-12 inches up foundation walls, fastening with mechanical fasteners or adhesive. Seal all gaps around piers, footings, and plumbing penetrations.
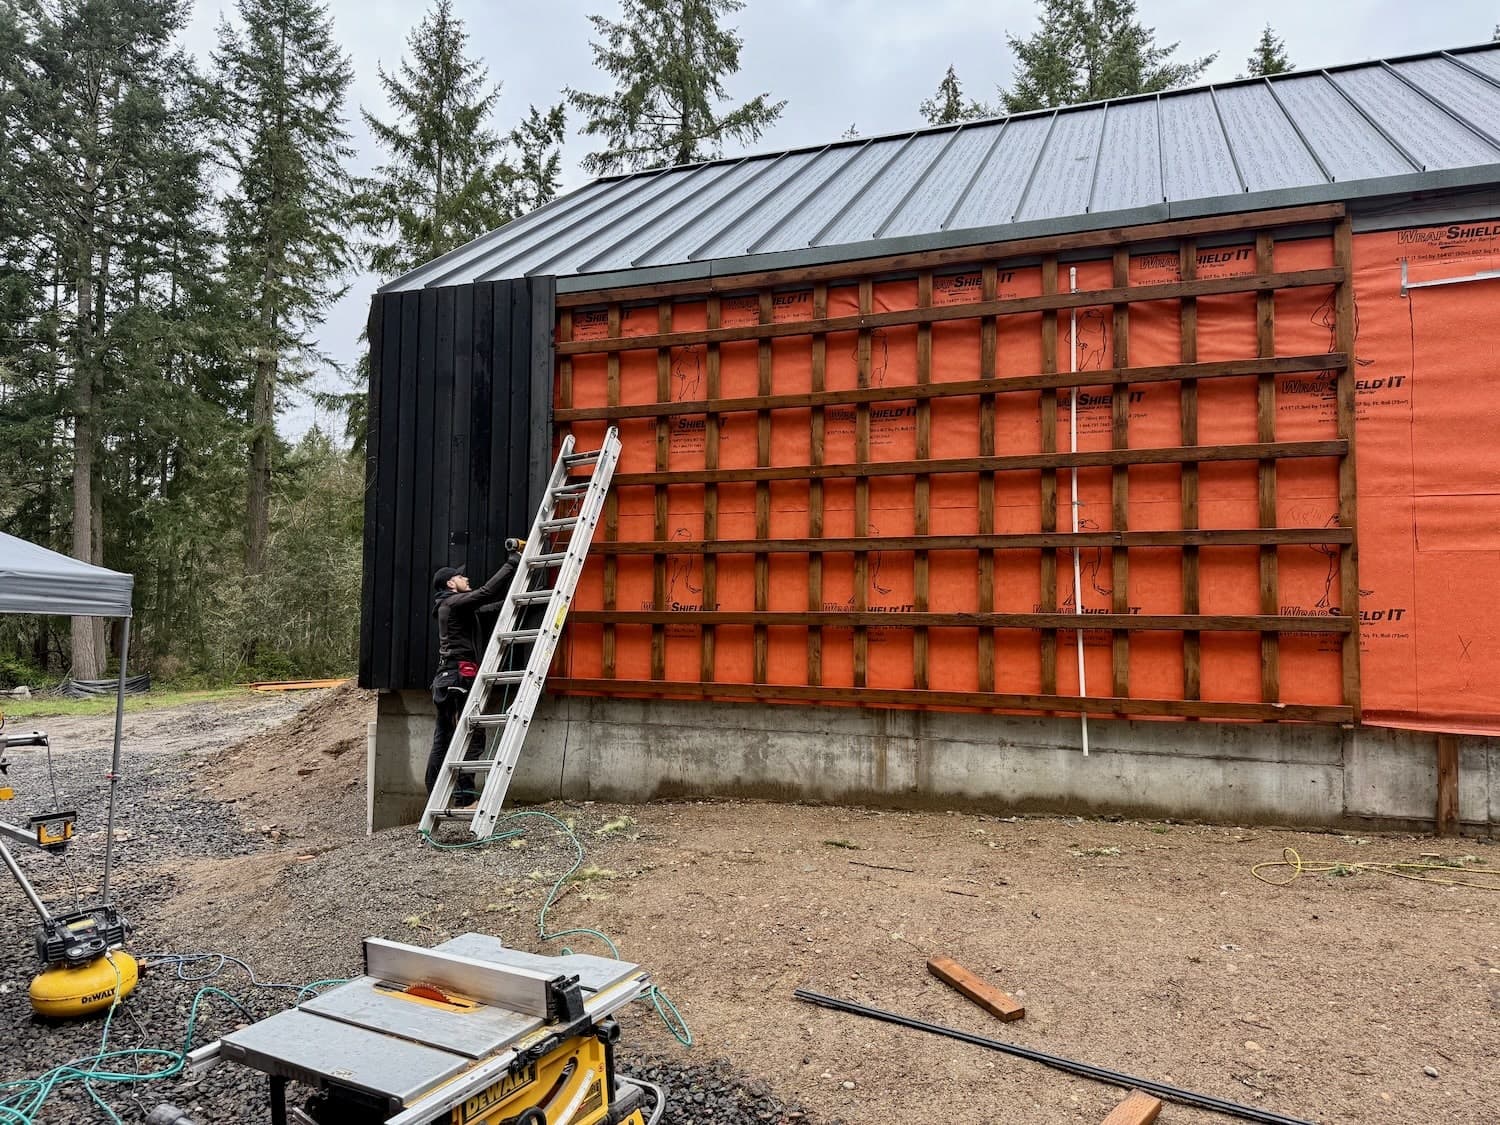
Consider rainscreen installation when replacing siding. This creates an air gap between siding and weather barrier using furring strips. The gap allows water to drain and air to circulate, drying moisture that gets past the siding. Rainscreen systems dramatically reduce rot risk in Seattle’s climate.
For windows and doors, proper flashing is more important than caulking. Use pan flashing at sills and head flashing at tops, integrating them with the weather-resistant barrier. Metal flashing lasts decades; caulk-only installations fail within years.
Attic and Crawlspace Ventilation
Proper ventilation prevents moisture accumulation in enclosed spaces where it condenses and promotes rot. Seattle’s high humidity makes this especially critical.
Check soffit and ridge vents for obstructions. Remove bird nests, leaves, and debris blocking airflow. Ensure insulation hasn’t been pushed against vents, blocking the air path. Good ventilation requires both intake vents (soffits) and exhaust vents (ridge or gable) working together.
While checking vents, inspect surrounding wood. Use a screwdriver to test soffit boards and roof framing near vents. Look for peeling paint, discoloration, or any signs of moisture damage. Scan for mycelium (white cotton-like growth) or musty odors indicating active rot.
Monitor indoor humidity levels using a hygrometer. Ideal relative humidity stays between 35-50%. Levels above 60% promote mold growth and wood rot. In Seattle homes, heating in winter can paradoxically increase indoor humidity by preventing natural ventilation.
Measure wood moisture content in attics and crawlspaces using a moisture meter. Dry rot requires wood moisture above 20%. Readings in this range demand immediate action—improve ventilation, install dehumidifiers, or identify and fix the moisture source.
Watch for condensation or frost on windows and cold surfaces. These indicate excessive indoor humidity that’s likely condensing in wall cavities and attics too, where you can’t see it.
For persistently damp crawlspaces, install a dehumidifier. Units sized for crawlspaces cost $200-$500 and dramatically reduce moisture. They’re particularly valuable in homes near Lake Washington or in low-lying areas where ground water maintains high humidity.
Ensure crawlspace vents remain open in winter unless you have a sealed, conditioned crawlspace. The old practice of closing vents in winter traps moisture from the ground, creating ideal rot conditions.
Professional Inspection and Services
Some dry rot problems exceed DIY capabilities. Knowing when to call professionals prevents small issues from becoming structural emergencies.
Call a professional when you find wood that sinks easily when you press a screwdriver into floor joists, support beams, wall studs, or roof trusses. These structural elements require expert assessment and repair. Compromised structural members threaten your home’s stability and safety.
Dry rot spreads through microscopic hyphae far beyond visible damage. What appears as a small window sill problem may extend deep into wall cavities. Professionals use moisture meters to detect the full extent of damage, even in areas you cannot see.
Professional inspections provide the most thorough assessment. Seattle Trim Repair offers a 15-point dry rot inspection that identifies hidden problems using commercial moisture meters and thermal imaging. This service finds concealed damage before it becomes structural, potentially saving thousands.
When inspection reveals rot, professional repair services ensure complete remediation. They remove all damaged wood back to solid material, treat surrounding areas with preservatives to kill fungal spores, identify and repair the moisture source causing the rot, replace damaged sections with appropriate materials, and install proper flashing and barriers to prevent recurrence.
Professional services cost more than DIY attempts but deliver guaranteed results. Labor rates run $65-$105 per hour. Trim replacement costs $321-$1,199. Moderate dry rot repairs average $1,500-$2,800. These investments restore structural integrity and prevent the $10,000-$20,000 costs of major structural rot repair.
For Seattle homeowners, professional expertise offers particular value. Local contractors understand PNW-specific challenges: which materials perform best in persistent moisture, proper rainscreen installation techniques, identifying hidden rot patterns common in Seattle’s housing stock, and navigating Seattle’s building codes and permit requirements.
Preparing your Seattle home for winter prevents the moisture accumulation that causes expensive dry rot. Maintain gutters and downspouts to direct water away from your home. Ensure proper grading so rain doesn’t pool near your foundation. Trim vegetation to promote airflow and drying. Seal and protect exterior wood before wet weather begins. Improve attic and crawlspace ventilation to prevent condensation. Inspect vulnerable areas and address problems while they’re small.
These preventive measures cost a few hundred dollars and several hours of fall work. They prevent rot repairs that can cost thousands or tens of thousands when structural damage develops. In Seattle’s challenging climate, prevention isn’t optional—it’s essential home maintenance that protects your investment and your family’s safety.
Ready to protect your Seattle home before winter? Call (425) 517-1751 for a free 15-point dry rot inspection or visit our dry rot repair page to learn more about prevention and repair services.
Not sure how bad yours is?
Send a photo or describe the spot over the phone. We will tell you whether it is a patch, a section, or something structural before anyone comes out.
Mon–Fri, 7:00am – 5:00pm
Questions homeowners ask us about this
Why is fall the critical time for dry rot prevention in Seattle?
How do Seattle's freeze-thaw cycles damage wood and promote rot?
What humidity level in my attic or crawlspace indicates rot risk?
Read next
- Dry Rot
Dry Rot Prevention vs. Repair Costs in Seattle
Annual dry rot prevention costs $200-$500 in Seattle. Repairs run $1,500-$100,000+. Learn why prevention saves thousands in King County's wet climate.
- Dry Rot
Dry Rot Prevention: 5 Ways to Stop Moisture Intrusion
Learn effective prevention strategies for dry rot caused by moisture intrusion. Professional inspections, maintenance schedules, and material choices.
- Siding Repair
Seattle Winters: Protecting Exterior Materials
Learn how Seattle's rainy, freeze-thaw winters damage siding, trim, and roofs, and which inspections, repairs, and materials prevent dry rot and leaks.
Get a straight answer on your siding, trim, or rot
Free estimate, no obligation, and usually a slot the same week. We cover Seattle, Bellevue, Redmond, Kirkland, Bothell, and Tacoma.
Mon–Fri, 7:00am – 5:00pm · Free estimates · Same-week scheduling